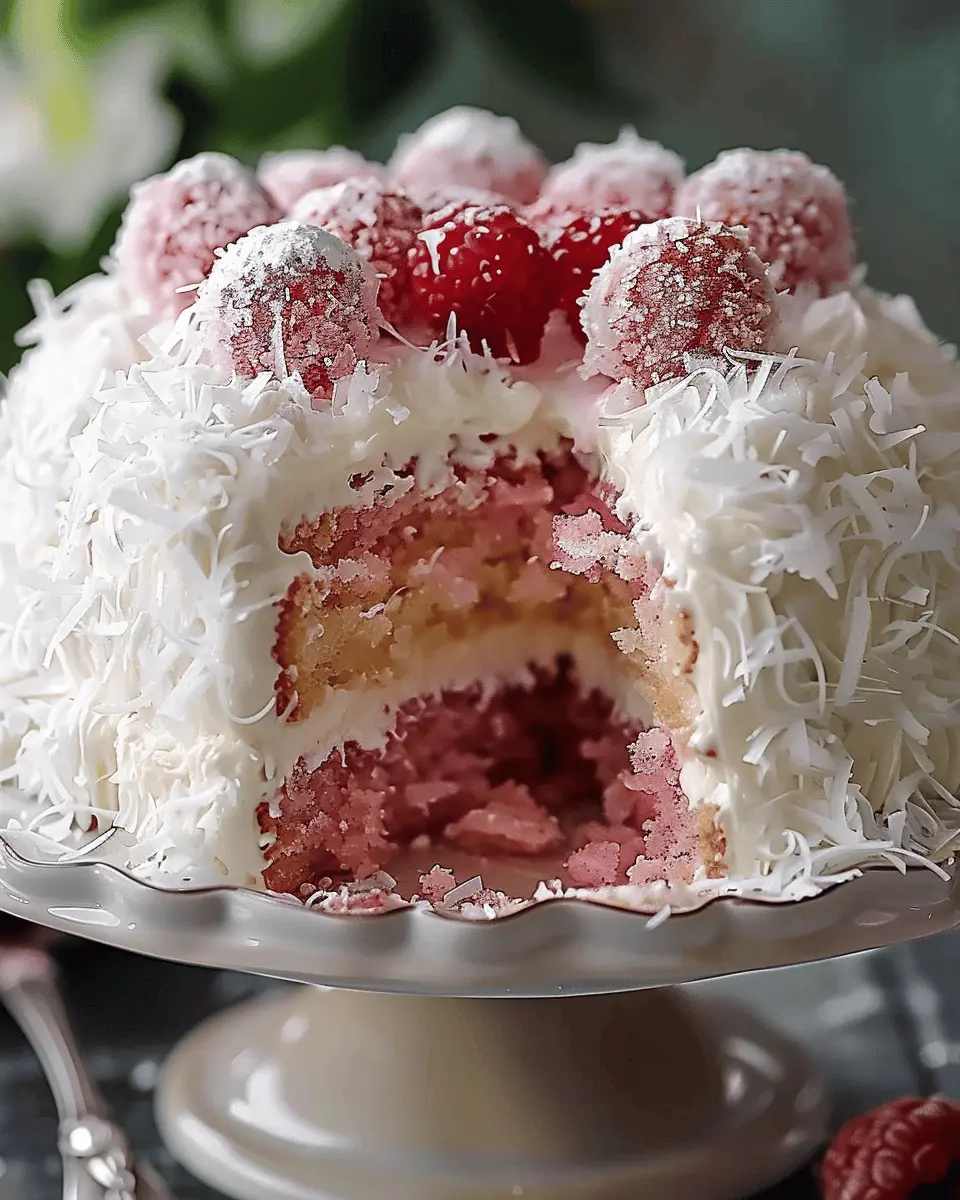
Introduction to Snowball Cake Recipe
Baking can often feel like a daunting task, especially when the holiday rush creeps in. This is where the Snowball Cake Recipe shines—it’s a delightful dessert that impresses with its simplicity and charm. If you’ve never tasted a Snowball Cake, you’re in for a treat. Imagine a moist, fluffy cake enrobed in a cloud of whipped cream and sprinkled with coconut. It’s like a mini vacation for your taste buds!
What is a Snowball Cake, and why should you try it?
At its core, a Snowball Cake is a beautiful confection that often features layers of cake, typically paired with light, fluffy frosting. Some variations include fruit fillings, which enhance the cake’s freshness and flavor. This dessert isn’t just aesthetically pleasing; it’s also a crowd-pleaser, making it perfect for gatherings where you want to win over friends and family with minimal effort.
So, why should you dive into making a Snowball Cake? Here are a couple of compelling reasons:
-
Effortlessly Elegant: The presentation is stunning, making it a star for any event. A well-made Snowball Cake can look quite impressive, and there’s something undeniably fun about serving a dessert that’s as soft and delicately textured as it looks.
-
Customizable: One of the best features of the Snowball Cake Recipe is its adaptability. You can easily incorporate seasonal fruit or switch up the frostings to suit your palate or occasions. Fancy a hint of lemon or a dash of chocolate in your cake? Go for it!
-
Time-Saving: While some desserts require hours of prep and refining, the Snowball Cake is surprisingly straightforward. With just a handful of ingredients and minimal time, you can create a dessert that tastes as if you’ve been slaving away in a bakery.
Think of it this way—when the next birthday or holiday comes around, rather than defaulting to store-bought cupcakes, why not impress everyone with your homemade Snowball Cake? For tips on baking, check out this baking basics guide. Let’s get ready to embark on this fluffy adventure!
Feeling inspired? Let’s dive into creating this delightful dessert that not only tastes good but brings people together around the dining table.
Ingredients for Snowball Cake
When it comes to creating the perfect Snowball Cake, having the right ingredients is essential. Let’s gather what you’ll need to make this delightful dessert that’s sure to impress your friends and family.
Core Ingredients
-
Cake:
-
2 cups all-purpose flour
-
1 ½ cups granulated sugar
-
½ cup unsalted butter, softened
-
1 cup buttermilk
-
3 large eggs
-
1 tablespoon baking powder
-
1 teaspoon vanilla extract
-
Frosting:
-
1 cup heavy cream
-
2 cups powdered sugar
-
1 teaspoon vanilla extract
Optional Add-Ins
-
Flavored Variations:
-
Consider adding lemon zest for a tangy twist or even some coconut flakes for added texture.
-
Decorative Touches:
-
Shredded coconut for that classic snowy look!
These ingredients will create a fluffy, delectable cake that melts in your mouth. If you’re interested in perfecting your technique, I recommend checking out some baking tips from expert bakers like Sally’s Baking Addiction or The Pioneer Woman. Happy baking with your Snowball Cake Recipe!
Step-by-Step Preparation of Snowball Cake
Creating a delightful Snowball Cake is not only a fun culinary project, but it also results in a visually stunning and delicious dessert that will wow your friends and family. Let’s dive into this step-by-step preparation guide that will make whipping up this cake a breeze!
Gather Your Ingredients
Before we even think about turning on the oven, let’s make sure we have everything we need. A well-prepared kitchen is the secret to a successful baking experience. Here’s what you will need for your Snowball Cake Recipe:
- 2 cups all-purpose flour
- 1 ½ cups granulated sugar
- ½ cup unsalted butter, softened
- 1 cup milk
- 3 ½ tsp baking powder
- 1 tsp vanilla extract
- ½ tsp salt
- 3 large eggs
- 1 cup raspberry preserves
- 3 cups shredded coconut (sweetened or unsweetened, depending on your preference)
- Optional: Creamy frosting or whipped cream for extra decadence
Make sure you check your pantry and fridge before starting. You might also want to consider using fresh raspberries as a garnish!
Preheat the Oven and Prepare the Pan
Now that we have our ingredients ready, it’s time to preheat the oven to 350°F (175°C). This step is crucial, as it ensures that your cake bakes evenly.
While the oven is heating up, prepare your cake pans. For this recipe, two 9-inch round cake pans work beautifully. Grease them with butter or oil and lightly dust them with flour to prevent the cake from sticking. You can also use parchment paper for an easier removal.
Create the Batter
In a large mixing bowl, it’s time to combine the dry and wet ingredients. Start with:
- Flour, baking powder, and salt. Whisks together in one bowl.
- In another bowl, cream the butter and sugar until light and fluffy. This usually takes about 3-5 minutes.
- Gradually beat in the eggs one at a time, ensuring they’re fully incorporated.
- Next, add the vanilla extract and mix until smooth.
Slowly combine the flour mixture and milk into the butter mixture; alternate between the two, starting and ending with the flour. Mix until just combined for the best texture.
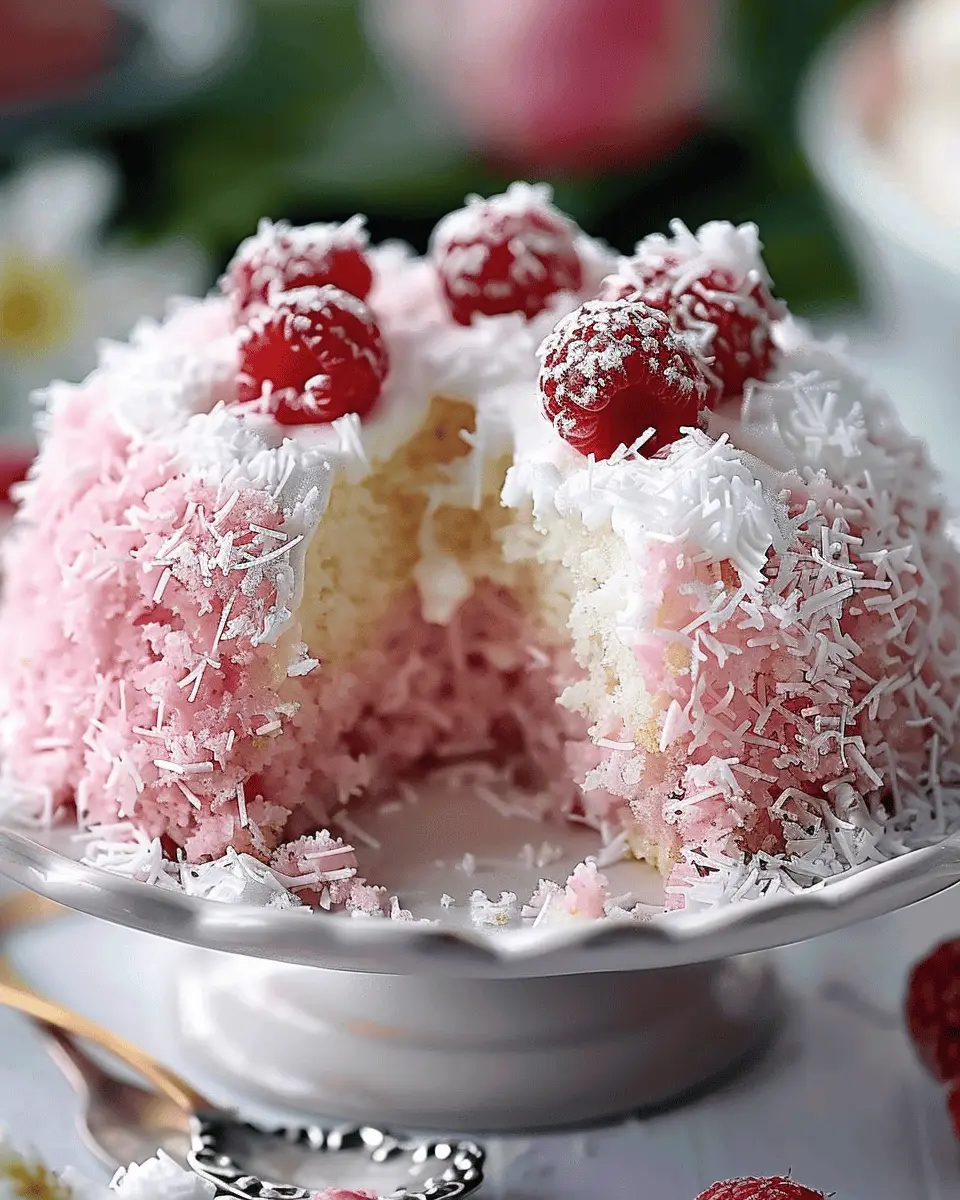
Add the Raspberry Preserves
Here comes the fun part—adding that tasty twist! Gently fold in the raspberry preserves into your batter. Make sure you distribute it evenly so every slice has that burst of flavor that complements the coconut perfectly.
Bake Your Delicious Snowball Cake
Pour the batter equally into the prepared cake pans. Place them in the preheated oven and bake for 25-30 minutes, or until a toothpick inserted in the center comes out clean. The delightful aroma of your cake baking will fill your kitchen—it’s hard to resist!
While the cakes are baking, prepare for some serious drooling. You can check out this amazing post about buttercream frosting for ideas on how to take your cake to the next level.
Cool and Coat with Coconut
Once your cakes are out of the oven, let them cool in the pans for about 10 minutes before transferring them to a wire rack. This cooling process is vital to ensure your cake doesn’t crumble when you frost it.
When completely cool, frost the top of one layer with your favorite frosting or simply use whipped cream, and add the second layer on top.
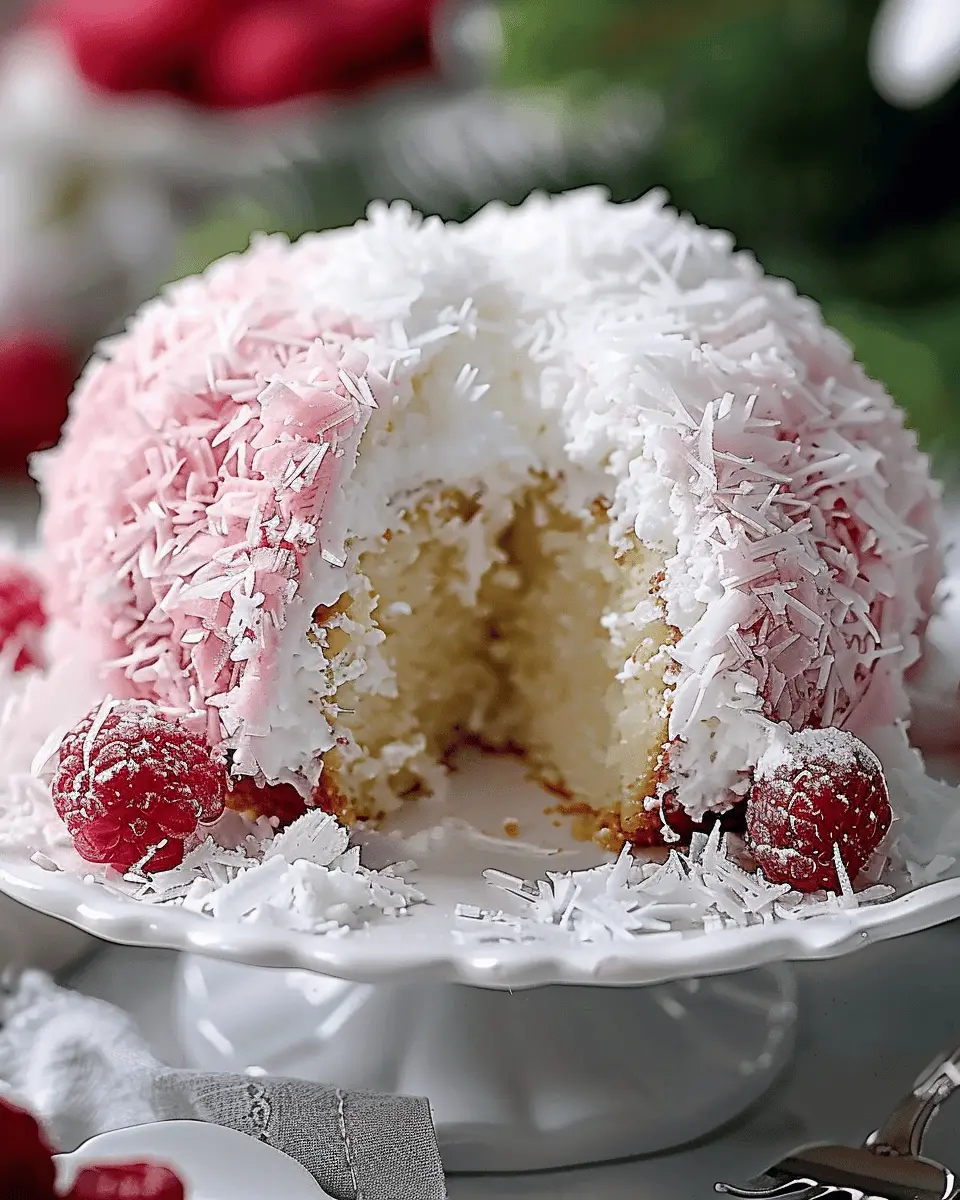
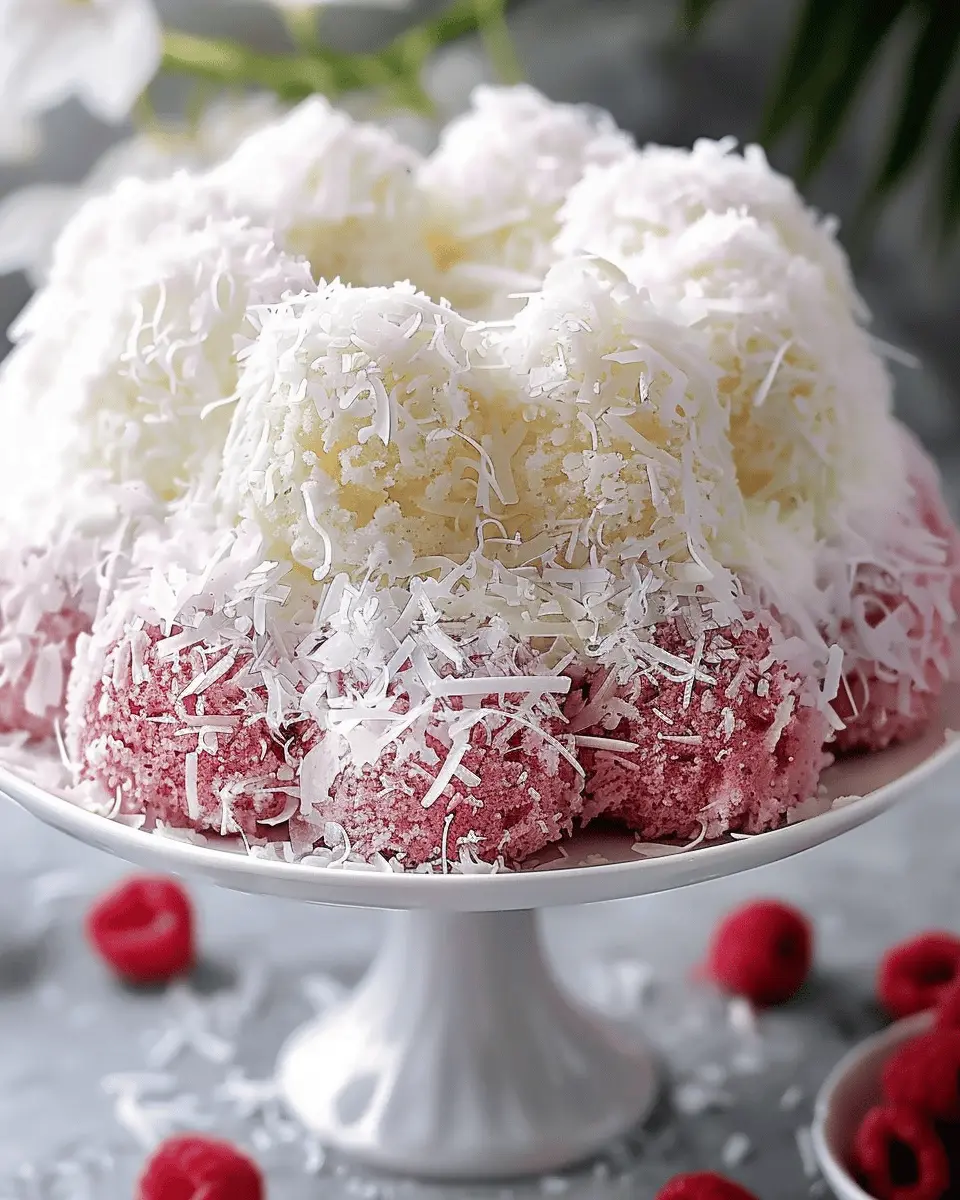
Finally, generously coat the entire cake with the shredded coconut. This is where the Snowball Cake gets its name! The coconut gives it that classic snowball look and adds a delicious texture.
And there you have it! Follow these clear steps and you’ll end up with a beautiful Snowball Cake that’s sure to impress. Enjoy sharing this sweet treat with friends and family—it’s a cake meant for celebrations and cozy gatherings alike!
Variations on Snowball Cake
When it comes to the classic Snowball Cake recipe, there’s so much room for creativity! You can easily infuse new flavors and styles into this delightful dessert. Let’s dive into a couple of fun variations.
Tropical Twist with Lime or Pineapple Preserves
Why not bring a taste of the tropics to your Snowball Cake? By swapping traditional fruit fillings with lime or pineapple preserves, you can add a zesty kick that’s both refreshing and exciting. To make this tropical version:
- Incorporate a layer of zesty lime curd or tangy pineapple preserves between the cake layers.
- Consider topping it off with toasted coconut flakes or lime zest for an eye-catching finish.
This twist not only enhances the flavor, but it also gives the cake a bright, sunny vibe that’s perfect for summer gatherings or even a surprise birthday bash!
Mini Snowball Cakes in Cupcake Molds
Looking for a fun presentation idea? Creating mini Snowball cakes in cupcake molds is a fantastic alternative. These bite-sized treats are perfect for parties or when you just want to indulge without the commitment of a large slice. To whip these up:
- Use standard cupcake molds to bake individual cakes.
- Once cooled, frost each mini cake and roll them in coconut for that snowy effect.
These little cakes are sure to impress your guests, giving everyone their own personal dessert!
With these variations, you can enjoy the Snowball Cake recipe in new and exciting ways. Share your creations with friends or bring them to gatherings for a guaranteed hit! For additional inspirations on variations, check out Food Network or Bon Appétit.
Cooking Tips and Notes for Snowball Cake
Avoiding over-swirl for distinct layers
When following the Snowball Cake Recipe, it’s tempting to swirl those layers together. However, to maintain beautifully distinct layers, be mindful of your technique. Aim for gentle yet deliberate swirls with your spatula. Over-mixing can result in a muddled color, losing that visually appealing contrast. Remember, less is more—just a few strokes can create the dreamy effects we love!
Adjusting baking times for mini versions
If you’re excited to try mini snowball cakes, you’re in for a treat! However, baking times will vary from the traditional recipe. Mini cakes typically require about 15-20 minutes less in the oven, so start checking them a few minutes earlier. The cakes are done when a toothpick inserted comes out clean. Using a small cake pan can give you adorable, bite-sized treats perfect for gatherings or a charming dessert platter.
For more baking insights, consider checking out The Kitchn for additional techniques and tips!
Serving Suggestions for Snowball Cake
Perfect Pairings for Your Dessert
When savoring your Snowball Cake, consider complementing it with light accompaniments. Fresh berries, like strawberries and raspberries, elevate the flavor profile and provide a colorful contrast. For a creamy twist, a scoop of vanilla or coconut ice cream pairs beautifully. Additionally, whipped cream or custard drizzled on top enhances its indulgence, making it feel extra special.
For a refreshing beverage, try pairing your dessert with a fragrant herbal tea or a sparkling fruit-infused water. These options cleanse the palate, allowing the dessert’s sweetness to shine through.
Creative Presentation Ideas
Elevate your Snowball Cake Recipe presentation with a few simple touches. Start by dusting the top with powdered sugar for a snowy effect. Arrange fresh fruit artfully around the cake for a vibrant pop of color. You could also serve slices on elegant dessert plates, garnished with mint leaves for a touch of sophistication.
Want to take it up a notch? Consider layering mini snowball cakes in clear cups for individual servings—this allows guests to see the delightful layers and textures. For more inspiration, check out this post on dessert presentation. Remember, how you present your cake can make all the difference in creating an unforgettable dining experience!
Time Breakdown for Snowball Cake
When diving into this delightful Snowball Cake Recipe, it’s helpful to know how long each step will take. Here’s a quick breakdown to keep you on track for a successful baking adventure.
Preparation Time
First up, we have the preparation time, which usually takes about 20 to 30 minutes. During this stage, you’ll gather your ingredients, measure them out, and get your pans ready.
Baking Time
Once everything’s prepared, pop your cake into the oven for about 25 to 30 minutes. It’s that sweet spot where the magic happens!
Cooling Time
After baking, you’ll want to let your cake cool for about 15 to 20 minutes before removing it from the pan. This helps prevent breakage and keeps your cake intact.
By planning ahead, you can easily fit this Snowball Cake Recipe into your day. Looking for tips to perfect your baking skills? Check out resources from the Baking 101 guide by Food Network for added insights. Happy baking!
Nutritional Facts for Snowball Cake
Calories per slice
When diving into the delightful world of a Snowball Cake Recipe, you’ll find that each slice typically contains around 250 to 300 calories. This makes it a sweet indulgence that can nicely fit into a balanced diet if enjoyed in moderation.
Key nutritional highlights
The essential nutritional highlights of Snowball Cake include:
- Fats: While it’s undeniably rich in flavor, the fats in this cake mainly come from butter and cream, providing some saturated fats that should be consumed mindfully.
- Sugars: With the sweetness comes sugar, contributing to the overall calorie count—making it a treat best reserved for special occasions.
- Protein: You can also find a small amount of protein, great for keeping you fueled and satisfied.
- Vitamins and Minerals: Ingredients like eggs can add beneficial vitamins such as B12 and riboflavin.
For more about balanced eating and dessert tips, consider checking sources like the American Heart Association or ChooseMyPlate.gov for guidelines on incorporating treats into a healthy lifestyle!
FAQs about Snowball Cake Recipe
Can I use frozen raspberries instead of preserves?
Absolutely! Using frozen raspberries can be a great alternative if you can’t find preserves or want a fresher taste. Just thaw them out and drain any excess liquid. It’s worth noting that frozen raspberries might not be as sweet, so taste them first and adjust the sugar in your Snowball Cake recipe as needed. This flexibility allows you to customize the sweetness to your liking!
What makes this cake unique?
The Snowball Cake stands out because of its delightful combination of flavors and textures. The fluffy white cake is complemented by creamy frosting, while the raspberry layer adds a touch of tartness. This contrast creates a wonderful culinary experience, perfect for celebrations or casual gatherings. Plus, its aesthetic appeal—coated in snowy-white coconut flakes—makes it visually stunning. As highlighted by baking aficionados, the layering technique also ensures every bite is a delightful surprise!
How should I store leftover Snowball Cake?
To keep your leftover Snowball Cake fresh, it’s best to store it in an airtight container in the refrigerator. This will help maintain its moisture and prevent it from drying out. If stored properly, it can last up to five days. If you anticipate longer storage, consider freezing slices individually and then wrapping them tightly before placing them in a freezer-safe container. Just thaw them overnight in the fridge when you’re ready to indulge again.
By following these tips, you can enjoy your delicious creation long after it’s made! For more expert tips, check out King Arthur Baking for baking guidance and inspiration.
Conclusion on Snowball Cake Recipe
Why you will love making this homemade delight
Making a Snowball Cake Recipe at home is a rewarding experience that brings a touch of sweetness to any occasion. The delicate layers of sponge cake paired with creamy frosting and tender coconut create a dessert that’s both delightful to taste and impressive in presentation.
- Customizable Flavors: Feel free to get creative! Add flavors like chocolate or almond to personalize your cake.
- Impressive Presentation: With its fluffy exterior and snowy texture, it’s a showstopper at gatherings.
- Satisfying Activity: Baking can relieve stress and spark joy, especially when shared with friends or family.
Whether you’re celebrating a special event or just indulging yourself, this cake is sure to become a favorite. Ready to whip it up? Check out more tips on baking and decorating on sites like The Kitchn to enhance your skills!
PrintSnowball Cake Recipe: Easy, Indulgent Dessert for Everyone
Delight in this easy Snowball Cake recipe, perfect for any occasion.
- Prep Time: 20 minutes
- Cook Time: 35 minutes
- Total Time: 55 minutes
- Yield: 8 servings 1x
- Category: Dessert
- Method: Baking
- Cuisine: American
- Diet: Vegetarian
Ingredients
- 2 cups all-purpose flour
- 1 ½ cups granulated sugar
- 1 cup unsweetened cocoa powder
- 1 tablespoon baking powder
- ½ teaspoon salt
- 1 cup whole milk
- ½ cup vegetable oil
- 2 large eggs
- 2 teaspoons vanilla extract
- 1 cup boiling water
- 3 cups whipped cream
- 1 cup powdered sugar
- ¼ cup chocolate shavings
Instructions
- Preheat your oven to 350°F (175°C). Grease and flour two 9-inch round cake pans.
- In a large bowl, mix the flour, sugar, cocoa powder, baking powder, and salt.
- Add the milk, vegetable oil, eggs, and vanilla extract, mixing until smooth.
- Carefully stir in boiling water until combined.
- Pour the batter evenly into the prepared pans and bake for 30-35 minutes.
- Let the cakes cool completely before removing from the pans.
- Once cooled, frost with whipped cream and sprinkle with powdered sugar and chocolate shavings.
Notes
- For added flavor, consider mixing in some peppermint extract for a festive touch.
Nutrition
- Serving Size: 1 slice
- Calories: 350
- Sugar: 25g
- Sodium: 150mg
- Fat: 15g
- Saturated Fat: 8g
- Unsaturated Fat: 5g
- Trans Fat: 0g
- Carbohydrates: 45g
- Fiber: 2g
- Protein: 5g
- Cholesterol: 60mg
Keywords: Snowball Cake Recipe, Dessert, Indulgent Cake