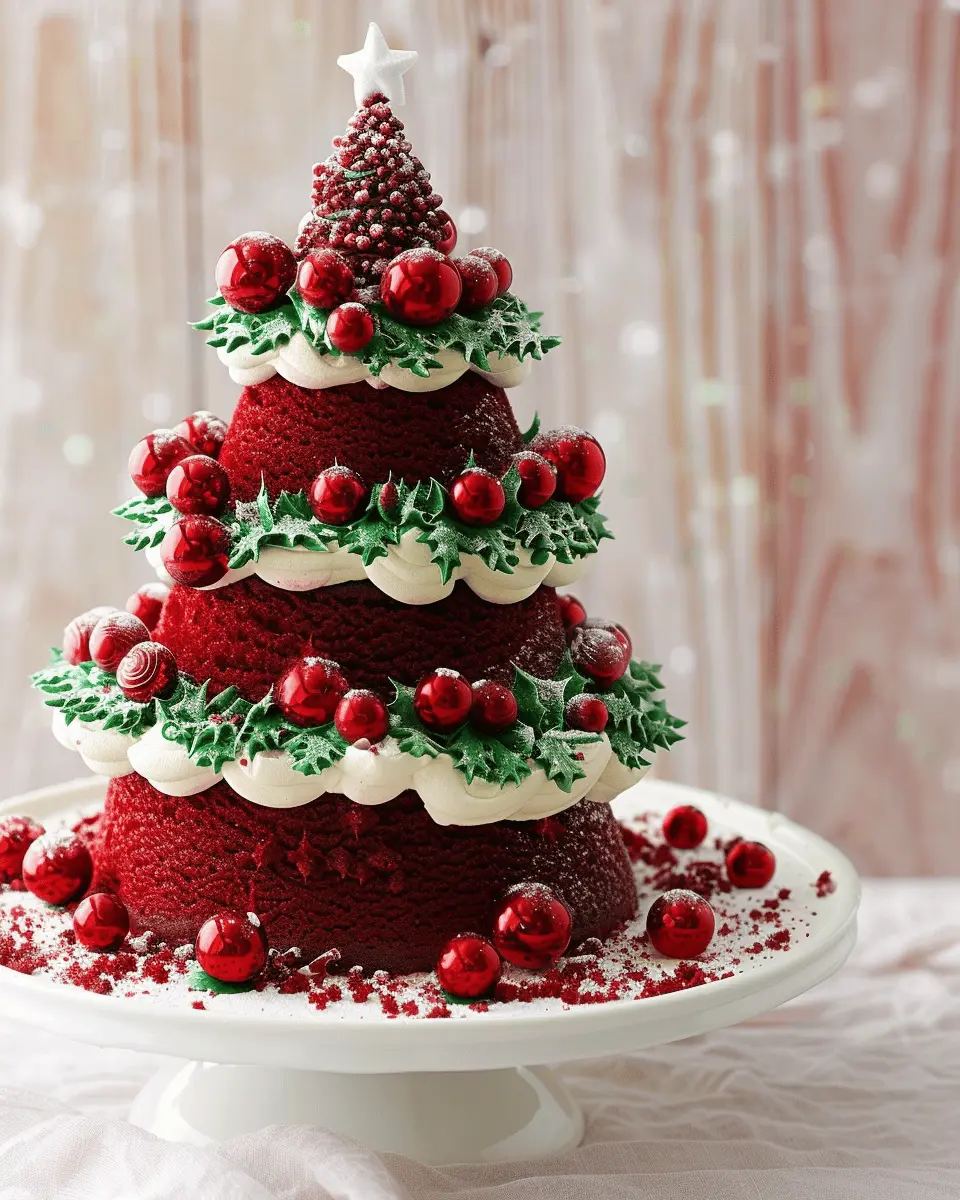
Introduction to Red Velvet 3D Christmas Tree Cake
The holiday season is synonymous with festivities, family gatherings, and of course, delightful desserts. This year, you can impress your friends and family with a stunning centerpiece: the Red Velvet 3D Christmas Tree Cake. But why choose red velvet? The answer is simple—this luxurious cake not only dazzles the eyes but also offers a deliciously rich and moist texture that perfectly complements the joyful spirit of the holidays.
Why Red Velvet for the Holidays?
The vibrant hue of red velvet evokes feelings of warmth and celebration, making it an ideal choice for holiday-themed baking. This cake has a unique flavor profile, combining subtle cocoa undertones with a creamy, tangy frosting that leaves everyone coming back for more. In fact, a well-made red velvet cake can be so enticing that it has become a tradition in many households during festive seasons.
Consider incorporating fun edible decorations like sprinkles or fondant ornaments, which turn your cake into a beautiful work of art. Not only does this enhance the appearance of your Red Velvet 3D Christmas Tree Cake, but it also engages the taste buds of both young and old. Plus, it’s a fabulous way to involve your kids in baking—imagine their smiles as they help decorate the cake!
For those looking to elevate the cake experience, pairing it with a rich hot cocoa or a refreshing peppermint tea can create a delightful combination. Plus, you can even check out expert tips on enhancing your baking skills from sources like America’s Test Kitchen and Food Network for more inspiration.
Your Red Velvet 3D Christmas Tree Cake will not only be a treat! It’s a memorable dessert that will spark conversations and create lasting holiday memories. So gather your tools, put on some festive tunes, and get ready to impress with this deliciously crafty cake that embodies the joy and spirit of the season!

Ingredients for Red Velvet 3D Christmas Tree Cake
Baking a Red Velvet 3D Christmas Tree Cake is a delightful way to celebrate the holiday season. Let’s dive into the essential components you’ll need for this festive creation!
Essential Ingredients for the Cake
To craft the perfect red velvet cake that stands tall and proud as a Christmas tree, gather these ingredients:
- 2 ½ cups all-purpose flour
- 2 cups granulated sugar
- 1 tsp baking soda
- 1 tsp salt
- 1 cup vegetable oil
- 1 cup buttermilk, at room temperature
- 2 large eggs
- 2 tbsp red food coloring
- 1 tsp vanilla extract
- 1 tsp white vinegar
These ingredients come together to provide a rich, moist, and vibrant cake that’s sure to impress your guests!
Ingredients for the Whipped Vanilla Buttercream
Now, let’s enhance your Red Velvet 3D Christmas Tree Cake with a luscious frosting. You’ll need:
- 1 cup unsalted butter, softened
- 4 cups powdered sugar
- 2 tbsp heavy cream or milk
- 2 tsp vanilla extract
This smooth and creamy frosting complements the cake perfectly, adding a touch of sweetness that will make each slice irresistible.
Ready to bake? Check out more tips for baking success at Serious Eats or baking.org to elevate your skills!
Preparing the Red Velvet 3D Christmas Tree Cake
Creating the perfect red velvet 3D Christmas tree cake is a delightful way to bring festive cheer to your holiday gatherings. This cake is not just a treat for the taste buds but also a feast for the eyes. Let’s break down the steps to ensure your cake turns out beautifully and deliciously!
Preheat and Prepare Your Pans
Start by preheating your oven to 350°F (175°C). While the oven warms up, prepare your cake pans. For this design, you’ll need three different-sized pans—typically an 8-inch, 6-inch, and 4-inch. Grease each pan with butter and lightly dust them with flour, or line them with parchment paper for easy cake removal later. This simple step ensures your red velvet 3D Christmas tree cake maintains its shape when it comes time to assemble.
Sift and Combine Dry Ingredients
In a large bowl, sift together your dry ingredients:
- 2 ½ cups all-purpose flour
- 1 ½ cups granulated sugar
- 1 teaspoon baking soda
- 1 teaspoon salt
- 1 tablespoon cocoa powder (for that subtle chocolate flavor)
Sifting not only helps avoid lumps but also aerates the flour, resulting in a light cake. For more on why sifting is essential, check out this informative piece on baking techniques from Serious Eats.
Cream the Butter and Sugar
In a stand mixer, beat together 1 cup of softened unsalted butter and 1 ½ cups of granulated sugar until light and fluffy—this usually takes about 3-5 minutes. This process is crucial, as it creates air pockets that help your cake rise. Pro tip: Allow your butter to sit at room temperature for about an hour before mixing—this will speed up the creaming process!
Mixing the Wet Ingredients
In a separate bowl, whisk together your wet ingredients:
- 1 cup buttermilk (or a substitute of milk and vinegar)
- 2 large eggs
- 2 tablespoons of red food coloring
- 1 teaspoon vanilla extract
- 1 teaspoon white vinegar
After whisking these ingredients together, slowly add them to your creamed butter mixture while the mixer is running at low speed. This creates a smooth, cohesive batter.
Combine the Mixtures and Bake
Gradually fold the dry ingredients into the wet mixture until just combined. Avoid overmixing, as this can lead to a tough cake. Divide the batter evenly among the prepared pans and bake for 25-30 minutes. To check if they’re done, insert a toothpick into the center; it should come out clean or with a few crumbs attached. Once baked, let the cakes cool in the pans for about 10 minutes before transferring them to a wire rack.
Making the Whipped Vanilla Buttercream
While the cakes cool, whip up your buttercream! In a mixing bowl, combine:
- 1 cup softened unsalted butter
- 4 cups powdered sugar
- 3-4 tablespoons heavy cream
- 2 teaspoons vanilla extract
Beat on high speed until fluffy and smooth—which typically takes about 5 minutes. If the icing is too stiff, add more cream, a tablespoon at a time, until you reach your desired consistency.
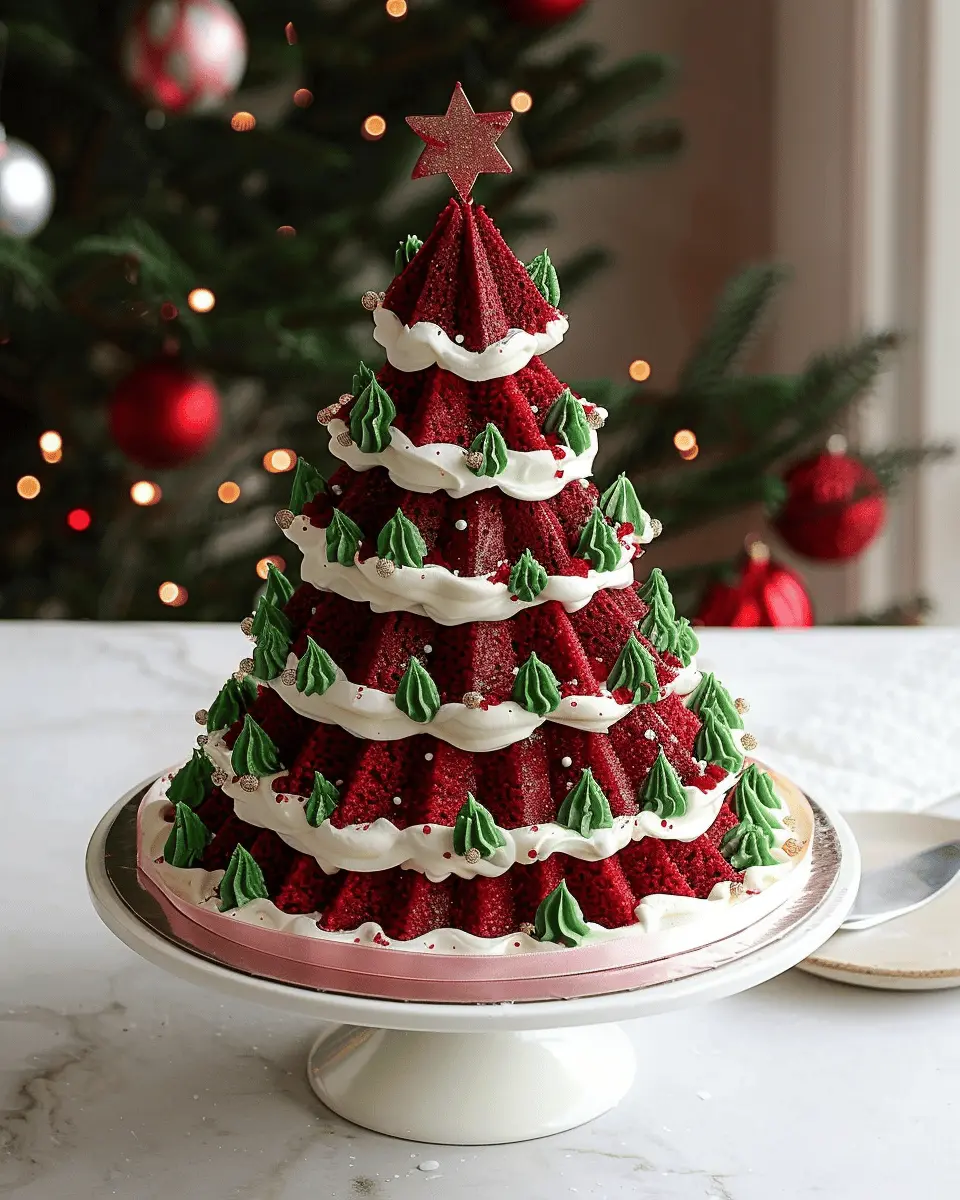
Cut and Shape the Cake
Once the cakes have completely cooled, it’s time to shape them. Place the largest round on your serving platter and trim the top to create a flat surface. Add a layer of buttercream, then stack the 6-inch cake on top, followed by the 4-inch cake. Layer more buttercream between the cakes for added flavor and stability.
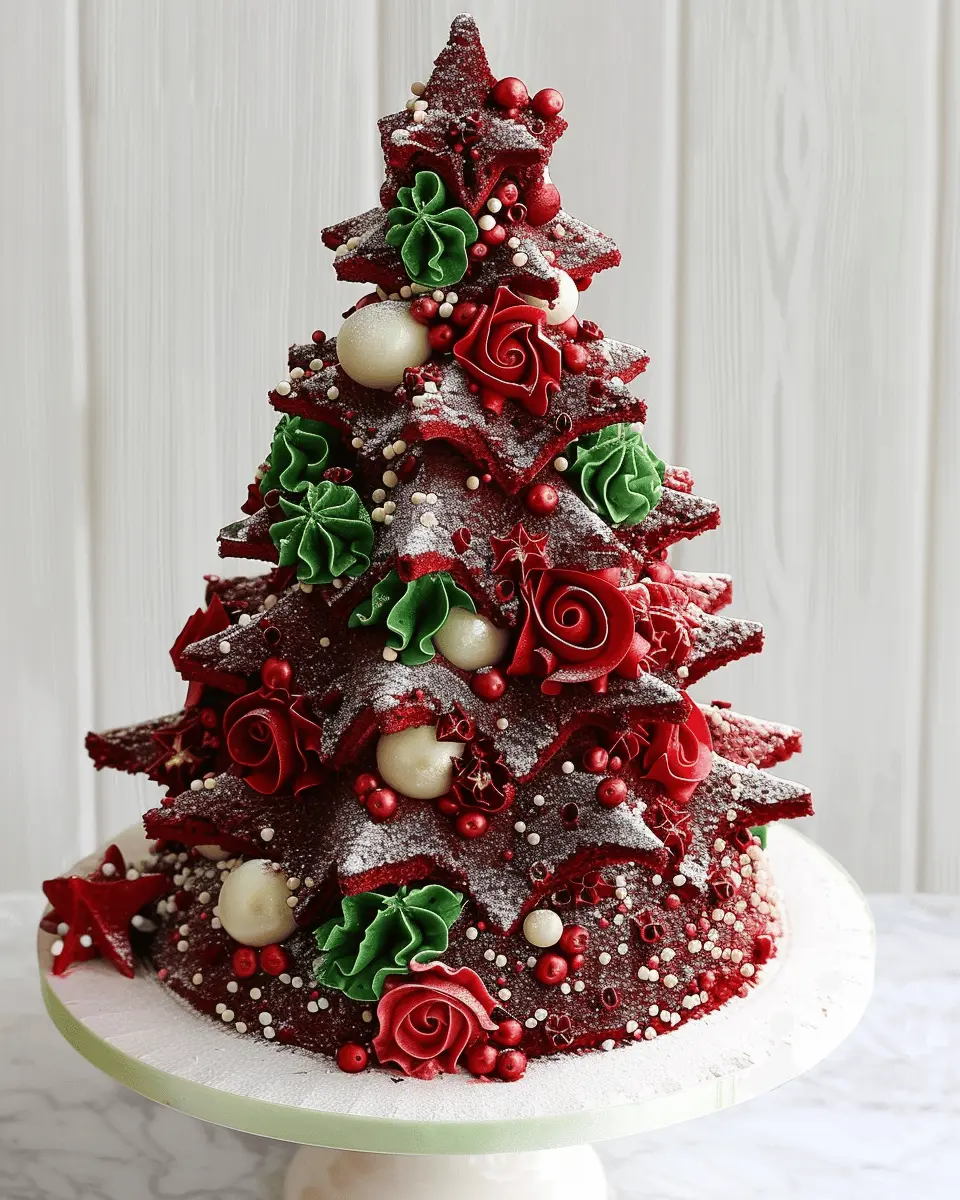
Decorate the Christmas Tree Cake
With your stacked cake ready, it’s time to transform it into a tree! Crumb coat the entire cake with a thin layer of buttercream to lock in any crumbs. Now, take your remaining buttercream and get creative! Pipe branches and decorative swirls to resemble a Christmas tree, and finish with festive touches like sprinkles, edible glitter, or candy decorations.
The end result? A stunning red velvet 3D Christmas tree cake that will be the talk of your holiday gathering. Enjoy every step, and don’t forget to snap some photos for social media before your guests dive in!
Variations on Red Velvet 3D Christmas Tree Cake
Red Velvet Cupcake Version
If you’re looking to impress your friends without the commitment of a full cake, consider transforming your Red Velvet 3D Christmas Tree Cake into delightful cupcakes! Simply use your red velvet cake batter and pour it into festive cupcake liners. Once baked, frost them with your favorite cream cheese icing, and sprinkle them with edible glitter or crushed candy canes for that holiday sparkle! These little delights are not just cute, but they also pack all the flavor of the classic cake—perfect for holiday parties or as a sweet gift for coworkers.
Gluten-Free Red Velvet Options
No need to miss out on the festive fun if you’re opting for a gluten-free lifestyle! You can easily recreate the Red Velvet 3D Christmas Tree Cake using gluten-free flour blends, available in most grocery stores. Simply substitute the all-purpose flour in your recipe with a 1:1 gluten-free blend, ensuring it contains xanthan gum for the right texture. Additionally, ingredients like almond flour can add a lovely nuttiness while keeping it moist. Worried about the taste? Studies show that gluten-free options can be just as delicious as their traditional counterparts! Check out Gluten-Free Girl for tips on achieving that perfect red velvet flavor without gluten.
With these variations, anyone can enjoy your festive centerpiece this holiday season! Whether you choose the cupcake route for a grab-and-go treat or opt for a gluten-free cake that doesn’t skimp on flavor, your Red Velvet 3D Christmas Tree Cake is bound to be a holiday hit.
Baking Tips and Notes for Red Velvet 3D Christmas Tree Cake
Avoiding Common Mistakes
When creating your red velvet 3D Christmas tree cake, aim for a moist, tender crumb. Ensure your ingredients are at room temperature to avoid a lumpy batter. Overmixing can lead to a denser cake, so mix until just combined. Don’t forget to use good-quality cocoa powder for that deep, rich flavor.
For an extra layer of holiday fun, consider adding a touch of peppermint extract into your frosting! It’s all about those festive flavors.
Chilling for Perfect Carving
Once your cakes are baked, let them cool completely before you start carving. Chilling them in the fridge for at least an hour makes slicing and shaping much easier, reducing the risk of crumbling. This technique ensures that your red velvet 3D Christmas tree cake maintains its lovely shape when you start stacking and decorating.
Pro tip: If time allows, freeze your cakes for a bit! It makes the carving process even easier. Check out this guide on cake cooling for more insights. Happy baking!
Serving Suggestions for Red Velvet 3D Christmas Tree Cake
Festive Presentation Ideas
When serving your red velvet 3D Christmas tree cake, why not create a delightful display that captures the holiday spirit? Consider placing your cake on a decorative cake stand and surrounding it with fresh pine branches or festive ornaments for that perfect Instagram moment. Sprinkling powdered sugar or edible glitter on top can mimic freshly fallen snow, making it even more enchanting. If you’re feeling extra crafty, a few edible sugar “gifts” made from fondant can be placed around the base of the tree to elevate the festive flair.
Pairing with Holiday Beverages
The right drink can elevate your red velvet 3D Christmas tree cake experience. A rich cup of hot cocoa topped with whipped cream can complement the cake’s luscious flavor beautifully. Alternatively, consider serving a warm spiced apple cider, which adds a cozy touch that pairs perfectly with the festive season. For those looking for something a bit fancier, try a sparkling cranberry juice spritzer; the tartness balances the sweetness of your cake flawlessly. These pairings not only enhance the flavors but also add a celebratory feel to your gathering.
For more inspiration on holiday treats, check out this holiday dessert guide.
Time Breakdown for Red Velvet 3D Christmas Tree Cake
When preparing your delightful red velvet 3D Christmas tree cake, getting the timing right can make all the difference. Let’s break down the process so you can efficiently manage your kitchen time and focus on the fun, festive aspects of baking.
Preparation Time
Preparing your ingredients and tools will take about 30 minutes. This is a great time to set up your workspace, gather your ingredients, and preheat your oven. Getting organized can make the actual baking experience much smoother.
Baking Time
The actual baking process will generally take around 45 minutes. Be sure to keep an eye on the oven and use a toothpick to test for doneness. A moist cake is essential for that perfect texture!
Total Time
In total, expect to spend about 1 hour and 15 minutes from start to finish. This includes prep, baking, and cooling time. With the right planning, you’ll have your beautiful red velvet 3D Christmas tree cake ready to impress your guests in no time!
For more tips on perfecting your baking skills, check out resources from ABC Cooking or BBC Good Food. Happy baking!
Nutritional Facts for Red Velvet 3D Christmas Tree Cake
When you’re indulging in a festive treat like the red velvet 3D Christmas tree cake, it’s essential to understand what you’re putting on your plate. This delightful cake packs a unique charm but also some nutritional notes worth considering. Let’s break it down.
Calories
On average, a slice of red velvet 3D Christmas tree cake contains about 300-400 calories. It’s a treat that’s meant to be enjoyed in moderation, especially during the holiday season.
Sugar and Fats
In each slice, you can expect roughly 30-40 grams of sugar and around 15-20 grams of fat. Given the cake’s rich cream cheese frosting, it’s no surprise that the sugar content is on the higher side. Using natural sweeteners or reducing frosting can help cut back a bit.
Protein Content
Protein-wise, this cake offers around 3-5 grams per slice, which isn’t much considering other protein-rich snacks. Pairing your cake with a glass of milk or a side of Greek yogurt can give you that extra protein boost for the day!
For a deeper dive into the nutritional value of cupcakes and cakes, check out Healthline for reliable insights.
With these facts in mind, you can make informed choices as you enjoy your festive baking adventures!
FAQs about Red Velvet 3D Christmas Tree Cake
How can I make my red velvet cake more moist?
If you’ve ever wondered how to achieve that melt-in-your-mouth texture everyone loves, you’re not alone. Here are some tips to keep your red velvet 3D Christmas tree cake moist and delicious:
- Use oil instead of butter: Oil adds moisture that butter can sometimes lack.
- Add an extra egg: This can add richness and moisture.
- Incorporate sour cream: A common trick for cake bakers is adding sour cream (or Greek yogurt) to the batter to enhance moisture.
- Don’t overbake: Keep an eye on those cakes! Overbaking can lead to a dry finish.
What can I substitute for buttermilk?
No buttermilk? No problem! Here are some fantastic substitutes you can use:
- Milk + vinegar or lemon juice: Simply mix one cup of milk with a tablespoon of either vinegar or lemon juice, let it sit for about 5-10 minutes, and voilà—homemade buttermilk!
- Yogurt: Thin some plain yogurt with water to get a similar consistency.
- Milk + cream of tartar: Mix one cup of milk with 1 ½ teaspoons of cream of tartar.
These easy alternatives will keep your red velvet 3D Christmas tree cake tasting fantastic!
How do I properly store my decorated cake?
You’ve poured your heart into decorating your cake, so it’s crucial to store it correctly:
- Keep it in a cool area: If it’s decorated with cream cheese frosting, place it in the fridge, but allow it to sit out for a bit before serving for optimal taste and texture.
- Cover it well: Use plastic wrap or a cake dome to prevent it from drying out.
- Avoid direct sunlight: Heat can melt frosting and ruin your hard work.
For more cake storage tips, check out this guide to ensure your masterpiece stays as delicious as the day you baked it!
Conclusion on Red Velvet 3D Christmas Tree Cake
Final Thoughts on Holiday Baking
Creating your red velvet 3D Christmas tree cake is more than just a cooking endeavor; it’s a delightful way to bring festive cheer to your holiday gatherings. This unique cake is not only visually stunning but also delicious, making it a fantastic centerpiece for any celebration. As you explore the art of holiday baking, remember that the joy lies in the process. Don’t hesitate to experiment with flavors, decorations, or even the cake’s design.
Lastly, sharing this sweet creation with friends and family creates lasting memories that are the true spirit of the season. Celebrate, enjoy, and happy baking!
PrintRed Velvet 3D Christmas Tree Cake: The Best Festive Delight
This Red Velvet 3D Christmas Tree Cake is the ultimate festive delight that will bring joy to any holiday celebration.
- Prep Time: 30 minutes
- Cook Time: 30 minutes
- Total Time: 1 hour
- Yield: 12 servings 1x
- Category: Desserts
- Method: Baking
- Cuisine: American
Ingredients
- 2 cups all-purpose flour
- 1 cup granulated sugar
- 1 cup vegetable oil
- 1 cup buttermilk
- 2 large eggs
- 2 tablespoons cocoa powder
- 1 tablespoon red food coloring
- 1 teaspoon vanilla extract
- 1 teaspoon baking soda
- 1 teaspoon vinegar
- 1/2 teaspoon salt
Instructions
- Preheat the oven to 350°F (175°C).
- In a bowl, mix together the flour, sugar, cocoa powder, baking soda, and salt.
- In another bowl, whisk together the oil, buttermilk, eggs, red food coloring, and vanilla extract.
- Combine the wet and dry ingredients, and mix until smooth.
- Add vinegar and mix well.
- Pour the batter into tree-shaped cake pans.
- Bake for 25-30 minutes or until a toothpick comes out clean.
- Let the cakes cool, then frost with cream cheese frosting.
- Decorate with edible ornaments to resemble a Christmas tree.
Notes
- For a more intense red color, increase the amount of red food coloring.
- Ensure all ingredients are at room temperature for best results.
Nutrition
- Serving Size: 1 slice
- Calories: 400
- Sugar: 30g
- Sodium: 200mg
- Fat: 20g
- Saturated Fat: 6g
- Unsaturated Fat: 10g
- Trans Fat: 0g
- Carbohydrates: 50g
- Fiber: 1g
- Protein: 4g
- Cholesterol: 50mg
Keywords: Red Velvet 3D Christmas Tree Cake, festive dessert, holiday cake