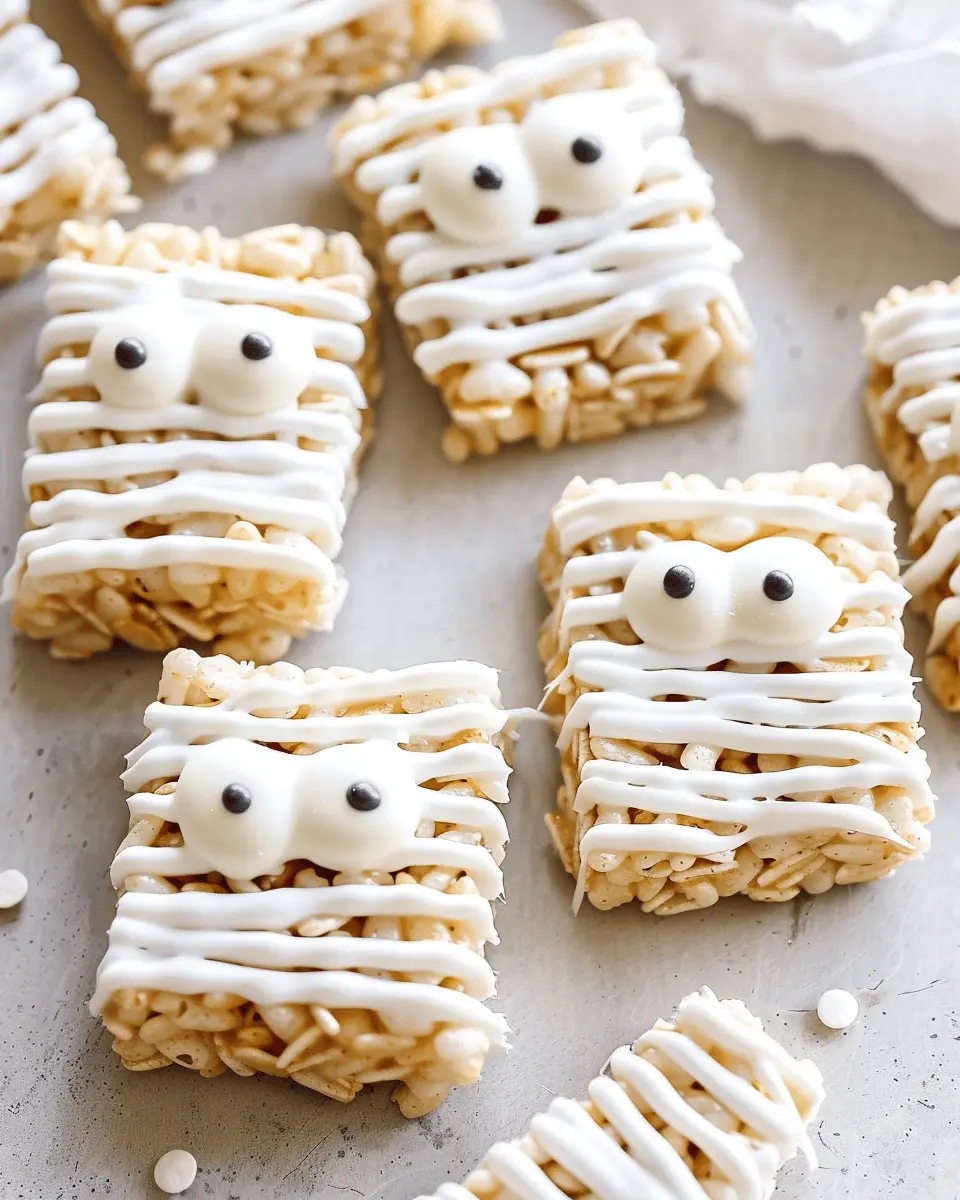
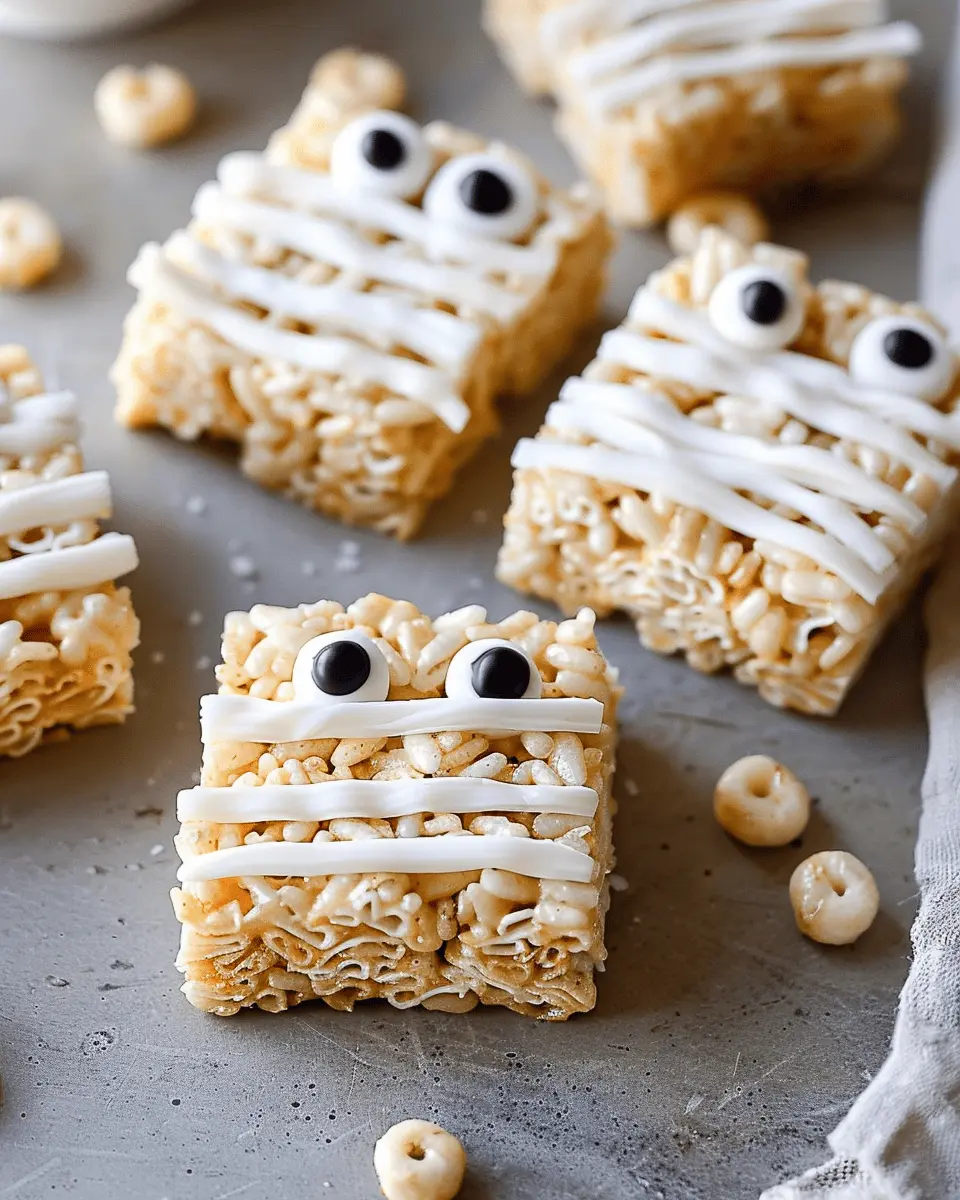
Introduction to Mummy Rice Krispie Treats
There’s something uniquely enchanting about Halloween treats that brings out the kid in all of us. This year, why not elevate your Halloween gatherings with a delightful twist on a classic? Mummy Rice Krispie Treats are not only easy to make but also pack a whimsical punch that will impress your friends and family. With their gooey texture and spooky appearance, they offer a perfect blend of nostalgia and fun.
Why Mummy Rice Krispie Treats are Perfect for Halloween Gatherings
First things first: why are mummy rice krispie treats the ultimate Halloween dessert? For starters, they are incredibly simple to whip up, making them ideal even for the most novice bakers. With just a handful of ingredients—Rice Krispies, marshmallows, butter, and some clever icing—you can create a festive treat that will have everyone raving.
- Easy and Quick: You can have these treats assembled in under 30 minutes. That leaves you plenty of time to enjoy Halloween festivities like decorating pumpkins or donning your favorite costume.
- Customizable: Feel free to get creative! Add colored sprinkles or edible googly eyes for a personal touch that adds to the fun. You can even substitute ingredients to fit various dietary needs—try using gluten-free cereal if you’re hosting friends with gluten sensitivities.
If you’re on the lookout for more Halloween inspiration, check out this Halloween treat ideas to make your gathering a hit!
Let’s not forget the visual appeal. Mummy Rice Krispie Treats serve as both a tasty snack and a conversation starter. The sight of cute little “mummies” wrapped in white icing is bound to draw guests in, sparking laughter and delight.
Don’t worry if you aren’t a master in the kitchen—these treats require no special skills. As long as you can melt butter and marshmallows, you’re on your way to engulfing the Halloween spirit. Just imagine serving these charming little mummies at your next gathering and watching everyone dive in, snapping photos and sharing them on social media. It’s a festive tradition that brings people together, creating lasting memories—all while satisfying that sweet tooth!
So, are you ready to haunt your kitchen with these delightful mummy rice krispie treats? Let’s get started!
Ingredients for Mummy Rice Krispie Treats
Creating Mummy Rice Krispie Treats is a delightful way to celebrate any festive occasion, especially Halloween! Let’s break down what you’ll need to make these tasty treats.
Essential ingredients for the classic recipe
To whip up your very own Mummy Rice Krispie Treats, you’ll need:
- 3 tablespoons of butter: This will give your treats that rich flavor.
- 1 package (10 oz) of marshmallows: About 40 regular marshmallows or 6 cups mini ones – both work wonders!
- 6 cups of Rice Krispies cereal: The classic cereal that brings that satisfying crunch!
- White chocolate or candy melts: For draping your mummies in gooey goodness.
- Candy eyes: These add the perfect touch to make your mummies come alive.
Optional add-ins or substitutions
Feeling adventurous? Here are some optional add-ins or substitutions to enhance your Mummy Rice Krispie Treats experience:
- Flavored extracts: Add a splash of vanilla or almond extract for added depth.
- Food coloring: Want to jazz up the color? Stir in some gel food coloring for a spooky twist.
- Substitutes for butter: You could also use coconut oil for a dairy-free option.
- Alternate cereals: Try peanut butter or chocolate-flavored cereals for a unique taste.
By grouping simple ingredients and exploring fun options, you can tailor these treats to fit your taste perfectly! For more treat ideas, check out resources on Better Homes & Gardens or Food Network. Happy cooking!
Step-by-Step Preparation of Mummy Rice Krispie Treats
It’s that time of year when festive treats come to life in your kitchen! Mummy Rice Krispie Treats are not just spooky but also incredibly fun and easy to make. This no-bake recipe is perfect for gatherings, Halloween parties, or even just a cozy night in. Ready to get started? Let’s dive into the delightful process!
Gather Your Ingredients and Supplies
Before you kick off your Mummy Rice Krispie Treats adventure, make sure you have everything you need on hand. Here’s what you’ll need:
-
Ingredients:
-
3 tablespoons unsalted butter
-
1 package (10 oz) mini marshmallows
-
6 cups Rice Krispies cereal
-
1 cup white chocolate chips or candy melts
-
Candy eyes (for the finishing touch)
-
Supplies:
-
Large saucepan
-
Mixing spoon
-
9×13 inch baking pan
-
Parchment paper or non-stick spray
-
Microwave-safe bowl (for melting chocolate)
Having everything ready will streamline your process, making it less stressful and more enjoyable.
Melt the Butter and Marshmallows
Grab your large saucepan and heat it over low heat. Add the butter and let it melt completely. Once melted, add the mini marshmallows. Stir continuously until the marshmallows are completely melted and smooth. This usually takes around 5-7 minutes. If you’re making a bigger batch, consider using two pans to speed things up!
Combine with Rice Krispies
Once your marshmallow mixture is smooth and creamy, it’s time to fold in the Rice Krispies cereal. Stir slowly but thoroughly until the cereal is evenly coated. The sticky mixture might seem a bit overwhelming at first, but that’s where the magic happens! You can also think of this step as a workout for your arm — mixing can be a bit of a challenge, but the results are worth it.
Press the Mixture into the Baking Pan
Next, prepare your 9×13 inch baking pan by either lining it with parchment paper or giving it a quick spray with non-stick spray. Transfer the Rice Krispies mixture into the pan, using a spatula or your hands (lightly greased) to press it down evenly. It should be tightly packed, so don’t be afraid to put some elbow grease into it. Allow it to cool for around 30 minutes.
Cut into Mummy Shapes
Once your mixture is set, take it out of the pan and cut it into fun shapes! While rectangular pieces are standard, you can use Halloween-themed cookie cutters for added flair—think ghosts, bat shapes, or of course, mummy rectangles. Consistency in size is key for even decorating later, so aim for around 2 inches by 3 inches.
Melt the White Chocolate and Add Candy Eyes
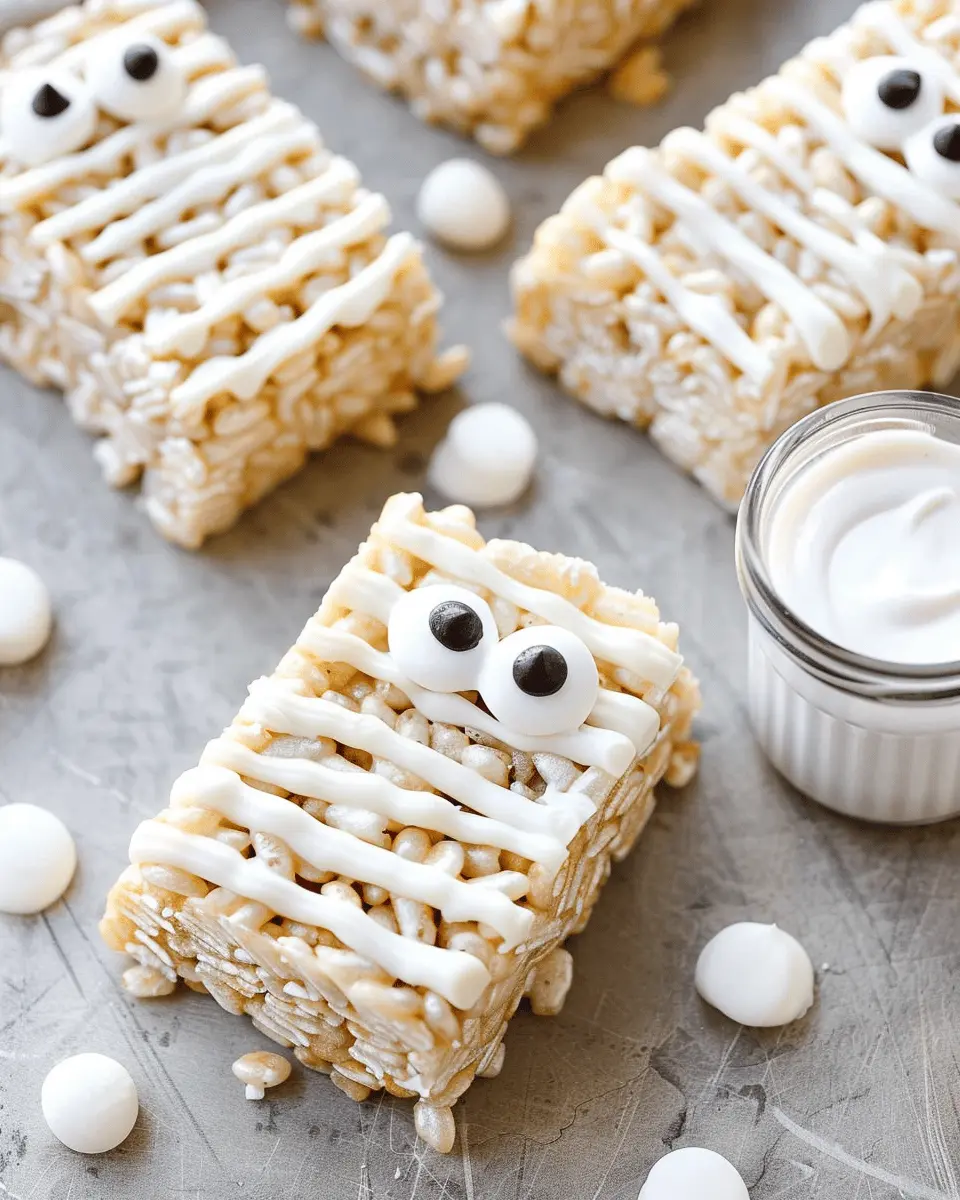
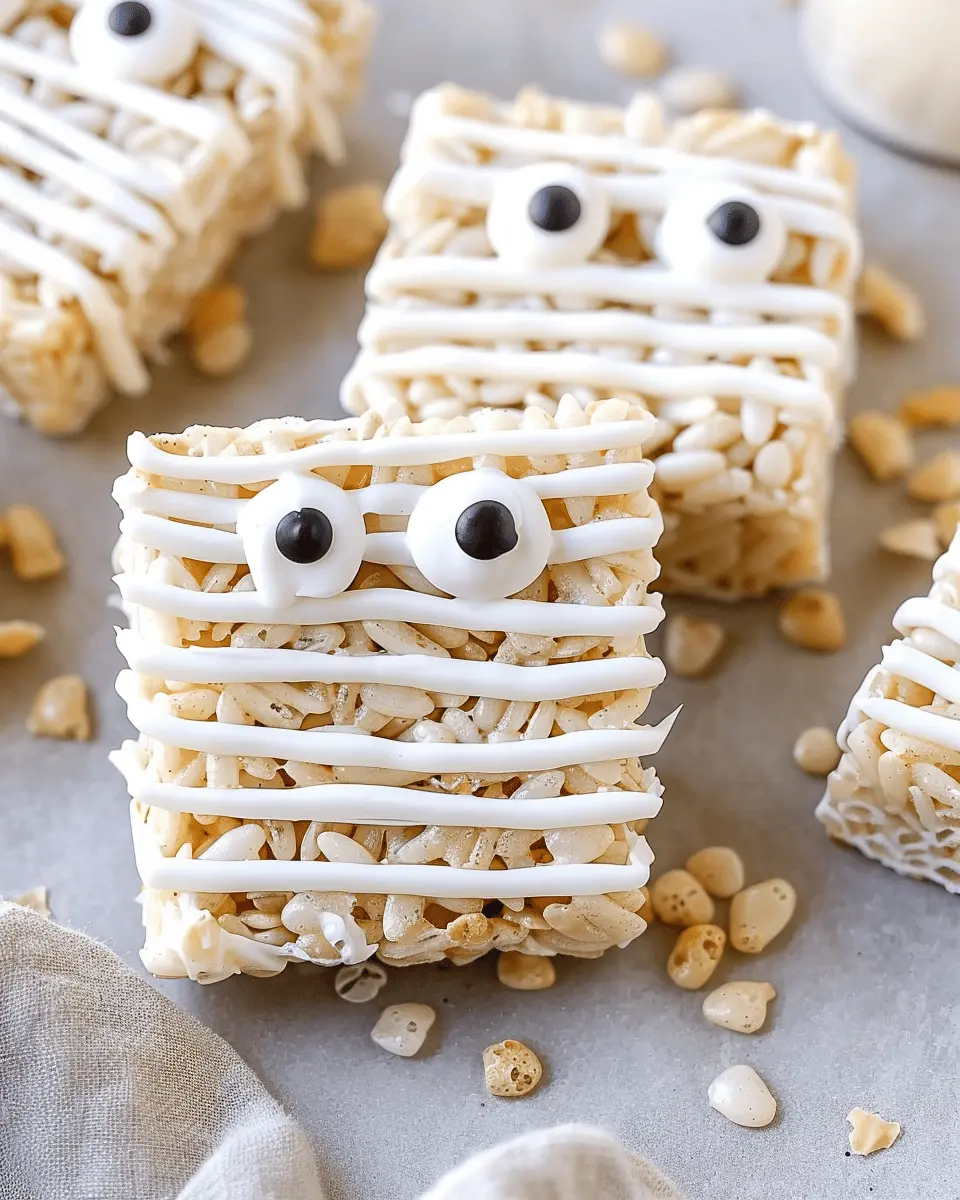
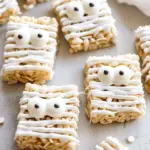
In a microwave-safe bowl, melt your white chocolate chips. Heat in 30-second intervals, stirring in between, until smooth and melted. If you’re using candy melts, you can follow the same method. Once melted, dip the top half of each Rice Krispie treat into the chocolate or use a spoon to generously drizzle it over the top. Immediately add candy eyes to the wet chocolate—this will help them stick nicely!
Drizzle Melted Chocolate for Mummy Wraps
Lastly, take a small piping bag or a zip-top bag (with a corner snipped off) filled with the remaining melted white chocolate. Drizzle it over each mummy treat in a crisscross pattern to create wrapping layers. This finishing touch adds character and charm to your Mummy Rice Krispie Treats, making them both cute and festive.
And there you have it! Easy, delicious, and a little bit spooky, Mummy Rice Krispie Treats are a fantastic addition to your autumn festivities. Whether you serve them at a Halloween gathering or share them with friends and family, they are sure to be a hit. Happy snacking! For more fun recipe ideas, check out Food Network or AllRecipes.
Variations on Mummy Rice Krispie Treats
When it comes to making mummy rice krispie treats, the fun doesn’t have to stop at the basic recipe! Let’s dive into a couple of exciting variations that will not only give you a delicious treat but also provide a unique twist perfect for any festive gathering.
Different Shapes and Sizes for the Treats
Why stick to squares when you can create all sorts of spooky shapes? Utilize cookie cutters to mold your mummy rice krispie treats into ghosts, pumpkins, or even friendly monsters! You can experiment with various sizes too—try making mini versions to serve as bite-sized snacks at a party. For a more dramatic flair, opt for larger pieces, perfect for centerpieces or sharing. The more variety you bring to the table, the more fun your presentation will be.
Using Colored Chocolate for Festive Flair
One of the best parts about making mummy rice krispie treats is the chance to customize them with colorful chocolate coatings. Melt white chocolate and mix in food coloring to create vibrant hues that align with your theme—think orange for Halloween or pastels for springtime celebrations. Drizzle these over your mummies to create unique designs or even use them to make pretty eyes. Not only does this add a visually appealing layer, but it also gives your treats an extra burst of flavor.
For more tips on customizing desserts, check out resources from Wilton and Food Network. You’ll find loads of inspiration to make your treats stand out! So gather your ingredients and get creative—the only limit is your imagination!
Cooking Tips and Notes for Mummy Rice Krispie Treats
When making your mummy rice krispie treats, you want the process to be as fun as the end result is delicious! Here are some helpful tips to keep in mind:
Avoiding sticky hands while preparing
Dealing with sticky hands can be a real nuisance when crafting these treats. To combat this, consider using a simple trick: wet your hands slightly with water or spray them with non-stick cooking spray before handling the mixture. This not only keeps the marshmallow from sticking but also allows you to easily mold the treats into mummy shapes. For additional tips on handling sticky ingredients, check out this helpful guide from Martha Stewart.
Ensuring even melting of chocolate
When drizzling chocolate over your treats, it’s crucial to melt the chocolate evenly for that perfect mummy look. Use a microwave-safe bowl and heat in short bursts of 15-20 seconds, stirring in between. This will make sure your chocolate doesn’t scorch, keeping it smooth and glossy. If you prefer a stovetop method, use a double boiler to melt the chocolate gently. Consistency is key—check out more tricks from Serious Eats for achieving that silky smooth finish.
With these tips, your mummy rice krispie treats will not only look adorable but will also be a delightful treat for all ages!
Serving Suggestions for Mummy Rice Krispie Treats
Creative Ways to Display the Treats
When it comes to serving your mummy Rice Krispie treats, presentation can elevate them from delicious to downright festive. Consider using a spooky platter or a vintage Halloween tray to showcase your treats. You can also place them in mini cauldrons or on a bed of edible grass (green coconut or dyed shredded wheat). For an extra touch, decorate the surrounding area with small plastic spiders or pumpkins – it brings a fun, interactive element to your display, perfect for gatherings.
Pairing with Halloween-Themed Snacks
To complement your mummy Rice Krispie treats, think about adding some Halloween-themed snacks that will delight your guests. Options like ghost-shaped cheese cubes or Turkey Bacon wraps make excellent companions. Perhaps even some crunchy pumpkin seeds or spooky pretzel sticks would add a nice texture contrast. A festive punch or sparkling apple cider serves as a perfect drink option to wash it all down. Look for creative punch recipes that can easily tie into the Halloween theme, making your snack table truly memorable. For more ideas, check out Taste of Home for stunning Halloween snack ideas!
Time Breakdown for Mummy Rice Krispie Treats
Preparation Time
Getting your mummy rice Krispie treats ready is quick and easy! You’ll spend about 15 minutes gathering your ingredients and mixing up that sweet, gooey goodness.
Cooling Time
After your treats are formed, let them cool for about 30 minutes. This step is essential, as it allows the treats to set properly before decorating.
Total Time
In total, from start to finish, you’re looking at approximately 45 minutes. Perfect for when you want to whip up a fun Halloween treat without spending all day in the kitchen!
So why not gather your supplies and dive into this fun recipe? For more inspiration, you can check out resources like FoodNetwork for variations on classic treats. Happy cooking!
Nutritional Facts for Mummy Rice Krispie Treats
Caloric Content Per Serving
When it comes to Mummy Rice Krispie Treats, these delightful snacks pack a fun punch without overwhelming your calorie count. Each treat has approximately 150 calories, making them a perfect indulgence when you want something sweet without excess.
Breakdown of Key Nutrients
Let’s break down the key nutrients, shall we? In every serving, you can expect:
- Carbohydrates: Around 24g, primarily from the crispy rice cereal, providing that delightful crunch.
- Sugars: Approximately 10g, thanks to the gooey marshmallows and a touch of sweet toppings.
- Fat: About 4g, mostly from the added toppings that create that rich flavor.
- Protein: A modest 1g, mainly from any added ingredients like yogurt drizzled on top.
For a more detailed analysis of ingredients, check out NutritionData for a comprehensive look at how these treats fit into your overall dietary goals. Remember, balance is key!
FAQs about Mummy Rice Krispie Treats
How long will they stay fresh?
One of the best things about mummy rice Krispie treats is their delightful shelf life! When stored properly in an airtight container at room temperature, they can stay fresh for up to 3 days. If you keep them in a cool, dry place, they might even last longer. Just be sure to avoid any high-humidity areas, as moisture can make these treats chewy rather than the perfect crispy delight.
Can I store them in the freezer?
Absolutely! If you want to prepare your mummy rice Krispie treats ahead of time, storing them in the freezer is a great option. Wrap them tightly in plastic wrap, and then place them in a freezer-safe container. They can last for up to 2 months in the freezer—perfect for getting a head start on your Halloween festivities! When you’re ready to enjoy them, simply thaw them at room temperature for a few hours or pop them in the microwave for a few seconds.
What alternatives can I use for chocolate?
If you’re looking for some mummy rice Krispie treats alternatives for chocolate, you’re in luck! Here are a few ideas:
- White chocolate: This is a classic choice for a spooky, creamy coating.
- Yogurt melts: A great option for a tangy twist; they can give a different flavor profile while still looking mummy-like.
- Caramel drizzle: Add a sweet touch, though this will alter the overall look.
- Colored candy melts: These come in a variety of colors, allowing you to customize your mummies for different occasions.
For more tips on fun treats and alternatives, check out this resource from Food Network.
If you have any more questions or creative suggestions, feel free to drop them in the comments! Enjoy your mummy-making adventure!
Conclusion on Mummy Rice Krispie Treats
Why You Should Make Them for Your Next Halloween Celebration
When it comes to spooky treats, Mummy Rice Krispie Treats are a must for any Halloween gathering! Not only are they delightfully easy to make, but they also bring a playful spirit to your dessert table that everyone—kids and adults alike—will love. The combination of gooey marshmallows and crispy rice cereal is simply irresistible, especially when dressed up to look like little mummies.
These treats are perfect for sharing at your Halloween parties or for an at-home movie night. Plus, they can be customized with various toppings! For more creative Halloween ideas, check out this fun article on the Food Network. So, grab your ingredients and get ready to impress your guests with these charming Mummy Rice Krispie Treats!
PrintMummy Rice Krispie Treats: Easy, Fun Halloween Snacks for All
Celebrate Halloween with these fun and easy Mummy Rice Krispie Treats that are perfect for kids and adults alike!
- Prep Time: 15 minutes
- Cook Time: 10 minutes
- Total Time: 25 minutes
- Yield: 16 treats 1x
- Category: Desserts
- Method: No-Bake
- Cuisine: American
- Diet: Vegetarian
Ingredients
- 3 tablespoons butter
- 1 package (10 oz) marshmallows
- 6 cups Rice Krispies cereal
- 1 cup white chocolate chips
- 1 tablespoon vegetable oil
- 1 cup candy eyes
- 1 cup black gel icing
Instructions
- Melt butter in a large saucepan over low heat.
- Add marshmallows to the melted butter and stir until completely melted.
- Remove from heat and add Rice Krispies, mixing until well combined.
- Press mixture into a greased pan and let cool.
- Melt white chocolate chips with vegetable oil in a microwave-safe bowl.
- Cut rice treats into mummy shapes and dip them in white chocolate.
- Add candy eyes and drizzle with black icing to create mummy features.
- Let set before serving.
Notes
- Try using colored chocolate for a fun twist!
- Store in an airtight container for up to a week.
Nutrition
- Serving Size: 1 treat
- Calories: 150
- Sugar: 10g
- Sodium: 40mg
- Fat: 6g
- Saturated Fat: 3g
- Unsaturated Fat: 2g
- Trans Fat: 0g
- Carbohydrates: 21g
- Fiber: 0g
- Protein: 1g
- Cholesterol: 10mg
Keywords: Mummy Rice Krispie Treats, Halloween Snacks, Easy Desserts