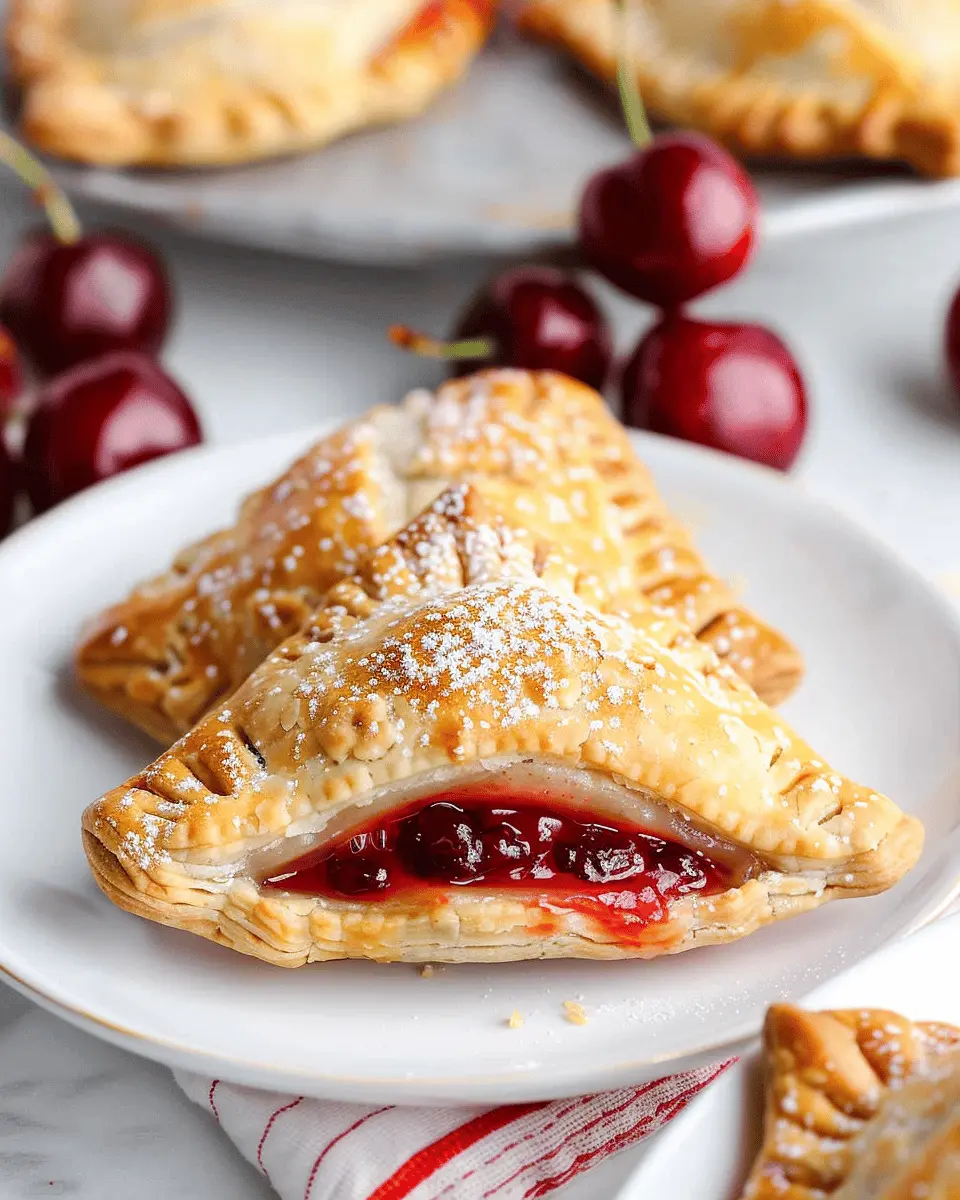
Introduction to Cherry Hand Pies
If you’re looking for a delightful treat that marries convenience with deliciousness, cherry hand pies are your answer! These little pastries pack a punch, giving you the perfect balance of sweet, tart cherry filling wrapped in a flaky crust. They are the ultimate grab-and-go snack that can brighten up your day — whether you’re headed to work, lounging at home, or enjoying a picnic.
Why Cherry Hand Pies are the Perfect Snack?
Cherry hand pies shine for a multitude of reasons, making them an ideal addition to your snack repertoire. Firstly, their portability is a game changer. Unlike a slice of cherry pie that requires a plate and fork, these hand-sized pastries can be eaten anywhere, making them a fantastic option for busy professionals. Imagine taking a quick break at the office or savoring one during your morning commute!
Moreover, the health benefits of cherries are noteworthy. Cherries are packed with antioxidants that help reduce inflammation and promote overall health. When you bake your own cherry hand pies, you control the sugar and ingredients, allowing for a delectable yet wholesome treat. It’s a delightful way to indulge while still making healthier choices.
- Easy to Prepare: Making cherry hand pies from scratch might seem intimidating, but they are surprisingly simple! With pre-made pie crusts, you can whip these up in no time.
- Customizable: Feel free to get creative! Add spices like cinnamon or nutmeg, or mix in some almond extract for an extra flavor boost.
- Perfect for Sharing: Whether at a gathering or just with friends, these individual pies are a fun way to share dessert.
As an added bonus, cherry hand pies can be made in advance and stored for those busy days when you need a quick snack. You can freeze them before baking, pulling out a few whenever a sweet craving strikes—it’s like having a little slice of summer preserved!
Ready to Dive Into the Recipe?
With so many reasons to love them, it’s time to roll up your sleeves and whip up a batch of these delicious cherry hand pies! They’ll not only satisfy your sweet tooth but also impress your friends and family. Grab your favorite recipes and let your culinary adventure begin.
Ingredients for Cherry Hand Pies
Essential ingredients for cherry hand pies
Creating delectable cherry hand pies is simpler than you might think! Here’s what you need to get started:
- Fresh or frozen cherries: The star of the show! You can use sweet or sour cherries based on your preference.
- Sugar: A bit of sweetness to balance the tartness of the cherries.
- All-purpose flour: For the flaky crust, which is essential for that signature hand pie texture.
- Butter: Unsalted is best for a rich, creamy flavor.
- Salt: Just a pinch to enhance the overall taste.
- Lemon juice: Fresh lemon juice adds a bright note and helps prevent browning—and it really boosts the cherry flavor!
Optional ingredients for flavor variation
If you’re feeling adventurous, consider these optional ingredients for your cherry hand pies:
- Almond extract: A few drops can add a lovely nuttiness.
- Cornstarch: To thicken the cherry filling, making it less runny.
- Spices like cinnamon or nutmeg: A sprinkle can warm up the overall taste profile.
- Egg wash: For a golden, shiny crust.
With this simple list, you’re well on your way to crafting delicious cherry hand pies that will impress your friends or elevate your dessert game! Curious for some more tips? Check out this guide to pie crust variations.
Preparing Cherry Hand Pies
Creating delightful cherry hand pies is a fun and rewarding baking adventure! These portable treats are perfect for picnics, parties, or just a sweet snack at home. Let’s dive into the detailed steps you’ll need to follow to craft these delicious pastries.
Gather and Prepare Your Ingredients
Before you jump into the baking process, it’s essential to gather all your ingredients. This not only saves time but also ensures you have everything on hand. Here’s what you’ll need:
- Pie crust: You can use store-bought for convenience or make your own from scratch.
- Cherry pie filling: Fresh cherries are fantastic if you’re up for it. Otherwise, canned or frozen varieties work just fine.
- Sugar: Adds sweetness to your filling.
- Cornstarch: Helps thicken the filling and create that perfect texture.
- Egg wash: A mixture of egg and water for a golden finish.
- Optional spices: A dash of cinnamon or almond extract can elevate the cherry flavor.
Don’t forget to prep your workspace! A clean, organized kitchen makes the whole process smoother.
Roll Out the Pie Crust
Now that your ingredients are ready, it’s time to roll out your pie crust. If you’re using refrigerated dough, let it sit at room temperature for about 10–15 minutes. This helps soften it, making it easier to work with.
- On a lightly floured surface, roll out the dough to about 1/8 inch thick. Aim for a circle—don’t stress about perfection; rustic is charming!
- Cut the dough into circles (about 4-5 inches in diameter) using a sharp knife or a round cutter. Keep re-rolling scraps until you’ve cut all the circles you can.
Pro tip: Keep an eye on the thickness of your dough. If it’s too thick, the hand pies might end up chewy instead of flaky.
Cut Out the Shapes
With your dough rolled out and cut, it’s time to create the shape for your cherry hand pies. You can get creative here!
- Use different shapes if you want to have fun with sizes—think hearts, diamonds, or simple squares.
- Ensure you have an even number of cutouts for a top and bottom for each pie.
If you want to learn more about how shapes can affect baking time, check out this comprehensive guide on baking techniques.
Fill the Hand Pies with Cherry Pie Filling
This is where the magic happens! Fill each pie crust with your chosen cherry pie filling:
- Spoon about 1-2 tablespoons of filling into the center of each crust. Be careful not to overfill; you want to make sure you can seal them properly without a messy overflow!
- If you’re feeling adventurous, try mixing in a bit of zest from an orange for a refreshing twist.
Seal the Pies and Prepare for Baking
Once filled, the next step is to seal your cherry hand pies:
- Fold the crust over the filling to create a half-moon shape.
- Press the edges with your fingers to seal, then crimp with a fork for a decorative touch.
- Don’t forget to cut a couple of small slits on top to let steam escape during baking.
After sealing, brush the tops with egg wash. This will give them that beautiful golden color. If you’re tweaking the recipe for dietary needs, consider using a dairy-free alternative for the egg wash.
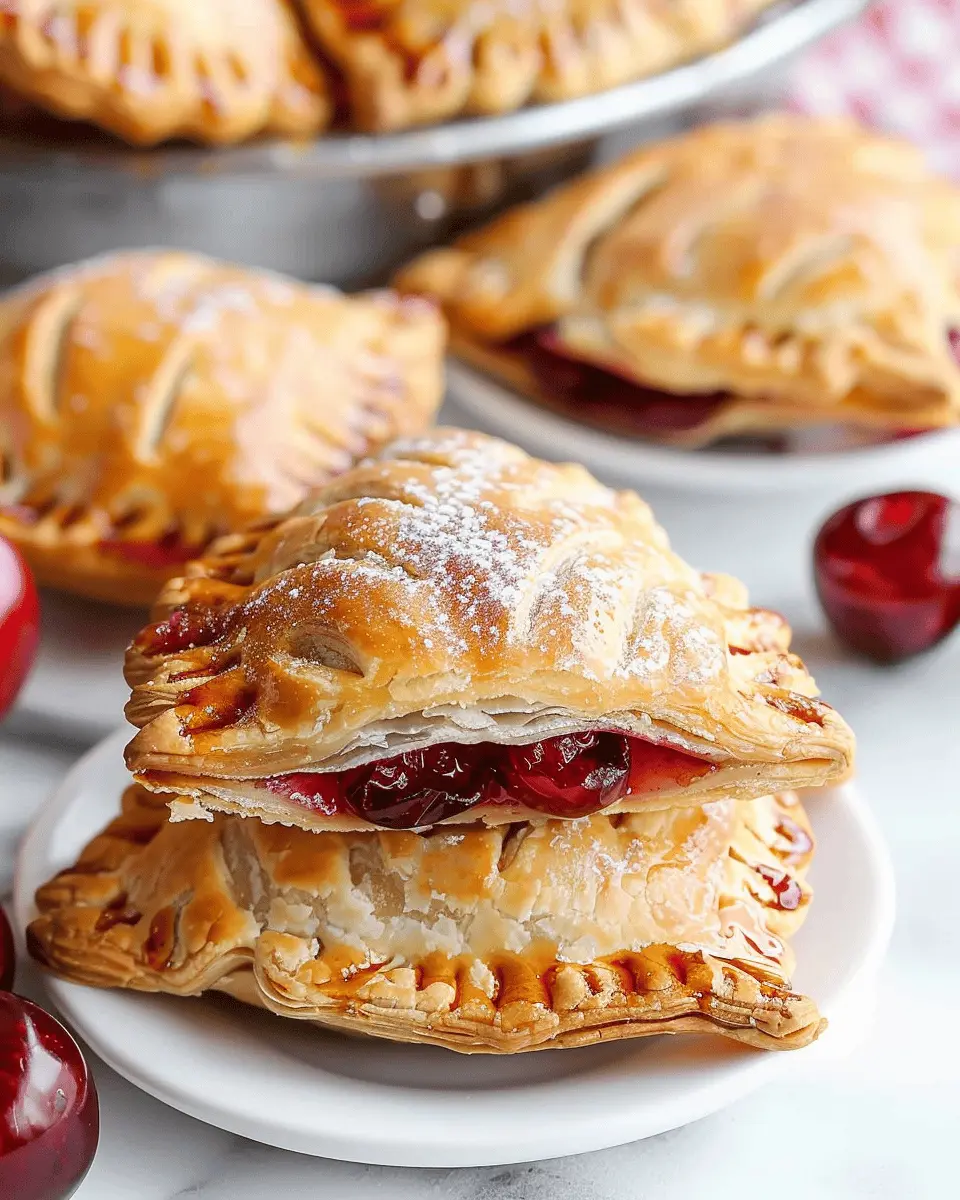
Bake to Golden Perfection
Preheat your oven to 375°F (190°C). Once your hand pies are beautifully sealed and brushed, place them on a parchment-lined baking sheet. Here’s how to finish them off:
- Bake for about 20-25 minutes, or until they turn golden brown and flaky.
- Let them cool for a few minutes before serving to avoid that molten cherry filling situation.
And there you have it—your cherry hand pies are ready to impress! Remember, these treats are just as delightful warm as they are at room temperature. Perfect for sharing, or not—no judgment here! Enjoy your homemade wonders!
Variations on Cherry Hand Pies
Alternate fillings for cherry hand pies
While cherry hand pies are undeniably delicious, exploring alternate fillings can take your pastry game to the next level. Consider these scrumptious options:
- Blueberry: Juicy and sweet, blueberry filling offers a delightful twist.
- Peach: Fresh peaches provide a sunny flavor, perfect for summer pies.
- Apple Cinnamon: A classic combination that warms the soul.
- Chocolate Cherry: For chocoholics, add chocolate chips to your cherry filling for an indulgent surprise.
If you’re interested in variations based on seasonal fruits, check out articles on popular fruit pie fillings here.
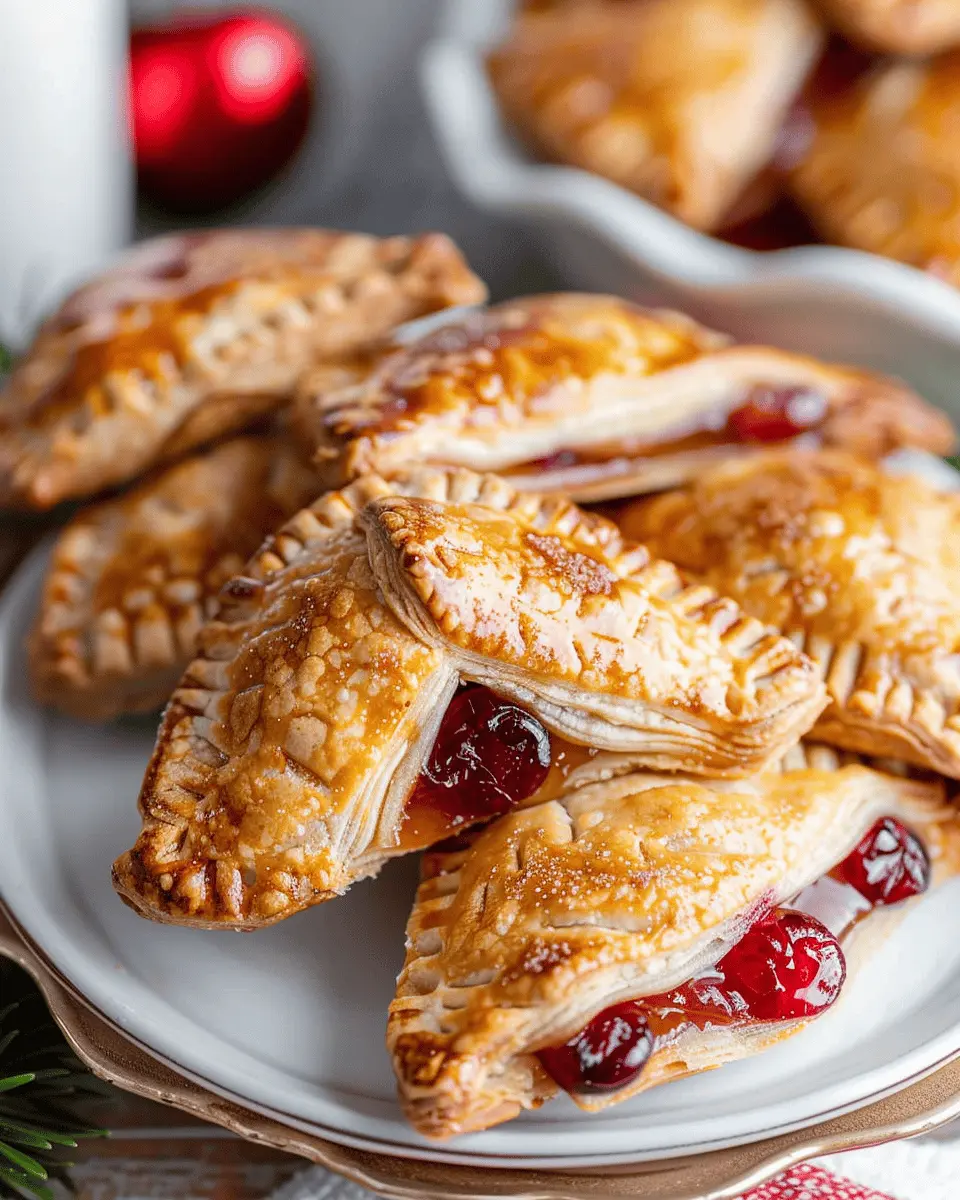
Festive flavors for the holidays
Embrace the spirit of the season by incorporating holiday-themed variations. Try adding spices like nutmeg or ginger to your cherry filling for a warm, festive flair. You might also explore pumpkin and chocolate fillings during the fall or crimson red cranberry fillings for a festive touch during the winter months. These seasonal adaptations not only enhance flavor but also make for charming presentations.
Shape and size creativity
Don’t feel confined to the traditional hand pie shape. Why not get creative?
- Mini Pies: Perfect for parties; mini versions are adorable and easy to grab.
- Larger Pies: Make a family-sized version that can easily be shared at gatherings.
- Themed Shapes: Use cookie cutters to create hearts for anniversaries or stars for the Fourth of July.
By playing with shapes and sizes, you can reflect your personality in your cherry hand pies, making each creation unique and memorable.
Remember, cooking is all about expression — so let your creativity shine! Happy baking!
Cooking Tips and Notes for Cherry Hand Pies
Best practices for achieving flaky crusts
When crafting those delightful cherry hand pies, the crust is what elevates them. To achieve that perfect, flaky texture:
- Keep everything cold: Use chilled butter and ice-cold water. It makes a world of difference in creating those flaky layers.
- Don’t overwork the dough: Gently mix your ingredients until just combined. This helps to keep the dough tender.
- Rest is key: Allow the dough to chill for at least 30 minutes before rolling it out. It relaxes the gluten, leading to a more tender crust.
Want more tips on pastry? Check out sources like King Arthur Baking.
Ingredient substitutes you might consider
Flexibility can be your friend in the kitchen! If you’re missing some ingredients for your cherry hand pies, try these substitutions:
- Butter: You can replace it with coconut oil for a dairy-free option.
- Sugar: Consider using honey or maple syrup to sweeten your filling naturally.
- Cherries: If fresh cherries aren’t available, frozen ones work beautifully too—just make sure to drain them well.
These simple swaps can help accommodate your pantry and dietary preferences while keeping the essence of your cherry hand pies intact!
Serving Suggestions for Cherry Hand Pies
Pairing Ideas for Hand Pies
When serving cherry hand pies, consider pairing them with delightful accompaniments that enhance their sweet, tart flavor. Here are some tasty ideas:
- Whipped Cream: A dollop of freshly whipped cream can elevate each bite. It’s light and airy, perfectly balancing the richness of the pastry.
- Vanilla Ice Cream: For a classic pairing, serve your hand pies warm with a scoop of creamy vanilla ice cream. The contrast in temperature is divine!
- Tea or Herbal Infusions: Brew a pot of chamomile or mint tea to sip alongside your hand pies. The gentle flavors complement the cherries beautifully, creating a comforting experience.
Creative Presentation Tips
How you present your cherry hand pies can make them even more inviting. Here are some fun ideas:
- Dusting of Powdered Sugar: A light sprinkle adds a touch of elegance and makes your pies look irresistible.
- Serving on a Rustic Platter: Use a wooden board or vintage plate to serve. This rustic presentation highlights the homemade charm of your pies.
- Accompany with Fresh Cherries: Scatter some fresh cherries around the hand pies on the platter for a pop of color and visual appeal.
These simple additions can turn your hand pies into a show-stopping dessert that friends and family will love.
Time Breakdown for Cherry Hand Pies
Preparation Time
Making cherry hand pies is a delightful endeavor that requires approximately 30 minutes of prep work. This includes gathering your ingredients, chopping cherries, and preparing your homemade pastry dough. It’s the perfect opportunity to crank up your favorite playlist or podcast, making the process not only efficient but enjoyable.
Baking Time
Once you’ve assembled these sweet treats, they’ll need about 25 minutes in the oven. Keep an eye on them as they bake to achieve that gorgeous golden-brown finish that makes these pies truly tempting.
Total Time
In total, you’re looking at around 55 minutes to whip up these delectable cherry hand pies. With such a quick turnaround, you can serve them warm for a snack or dessert. Trust me, everyone will be asking for seconds!
For some helpful tips, check out this baking guide for optimal pie-baking techniques. Plus, you might find inspiration from platforms like The Great British Bake Off on how to present your pie creations beautifully!
Nutritional Facts for Cherry Hand Pies
When it comes to indulging in cherry hand pies, it’s always nice to know what you’re biting into. Here are the essential nutritional facts to consider if you’re keeping an eye on your diet.
Calories
A typical cherry hand pie contains around 240 calories per serving. This makes it a delicious yet manageable treat when you need a sweet pick-me-up.
Protein Content
On the protein front, you can expect about 2-3 grams per pie. While they aren’t a significant source of protein, pairing them with Greek yogurt can create a balanced snack.
Sugars and Fats
Cherry hand pies generally have around 10 grams of sugar and 8 grams of fat. Most of the sugar comes from the fruit filling, making this a guilt-free indulgence, especially when using fresh cherries. For tips on reducing sugars in desserts, check out this helpful resource.
By enjoying these hand pies in moderation, you can savor their delightful flavors without sacrificing your health goals!
FAQs about Cherry Hand Pies
What’s the best way to store cherry hand pies?
To keep your cherry hand pies fresh and delicious, store them in an airtight container at room temperature for up to three days. If you’re dealing with an abundance of pies (lucky you!), consider placing parchment paper between layers to maintain their crust’s crispness. For longer storage, the fridge can keep them good for about a week. Just be aware that refrigeration might soften the crust a bit.
Can I freeze cherry hand pies?
Absolutely! Freezing is a fantastic way to preserve your cherry hand pies for future snacking. After they’ve cooled completely, wrap each pie in plastic wrap and place them in a freezer-safe bag or container. They can last in the freezer for up to three months. When you’re ready to enjoy a pie, let it thaw overnight in the fridge, then reheat it in the oven at 350°F (about 175°C) until warm and crispy again.
What are some good substitutions for pie crust?
If you’re looking to mix things up or have dietary restrictions, there are several tasty substitutes for traditional pie crust.
- Phyllo Dough: Light and flaky, it can create a wonderful texture.
- Graham Cracker Crust: Perfect for a sweet, crumbly base.
- Almond Flour Crust: Great for gluten-free options while adding depth.
- Store-Bought Doughs: Don’t shy away from convenience; many brands offer delicious options.
Experimentation is the key! You might find a new favorite.
If you want to dive deeper into pie-making tips and tricks, check out Serious Eats or Bon Appétit for expert advice and inspiration.
With these tips in mind, you’re all set to create delightful cherry hand pies that everyone will love!
Conclusion on Cherry Hand Pies
Final thoughts on making hand pies at home
Cherry hand pies are a delightful way to indulge your sweet tooth while impressing friends and family. Making them at home is surprisingly simple, allowing you to customize the filling and crust to your liking. Whether you opt for fresh cherries or preserve, the irresistible combination of flaky pastry and juicy cherry goodness is hard to resist.
As a bonus, hand pies are portable, making them ideal for picnics or quick snacks. Don’t hesitate to get creative with flavors and toppings! Explore different fruit options or try adding a touch of cinnamon for a unique twist. With some practice, you’ll master these charming treats in no time!
For more inspiration on fruit-filled desserts, check out Food Network’s dessert section for further culinary ideas. Happy baking!
PrintCherry Hand Pies: The Best Sweet Treat for Your Home Baking

Delightful cherry hand pies perfect for a sweet craving.
- Prep Time: 15 minutes
- Cook Time: 25 minutes
- Total Time: 40 minutes
- Yield: 10 hand pies 1x
- Category: Desserts
- Method: Baking
- Cuisine: American
Ingredients
- 2 cups fresh cherries, pitted and halved
- 1 cup granulated sugar
- 1 tablespoon cornstarch
- 1 tablespoon lemon juice
- 1 teaspoon vanilla extract
- 1 package pre-made pie crusts
- 1 egg, beaten (for egg wash)
Instructions
- Preheat your oven to 400°F (200°C).
- In a medium bowl, mix the cherries, sugar, cornstarch, lemon juice, and vanilla extract.
- Roll out the pie crust and cut it into circles.
- Place a spoonful of the cherry mixture onto one half of each circle.
- Fold the dough over and seal the edges with a fork.
- Brush the tops with the beaten egg.
- Bake for 20-25 minutes or until golden brown.
Notes
- These hand pies are best served warm.
- You can add a sprinkle of powdered sugar on top for extra sweetness.
Nutrition
- Serving Size: 1 hand pie
- Calories: 210
- Sugar: 12g
- Sodium: 150mg
- Fat: 9g
- Saturated Fat: 2.5g
- Unsaturated Fat: 5g
- Trans Fat: 0g
- Carbohydrates: 30g
- Fiber: 1g
- Protein: 2g
- Cholesterol: 30mg
Keywords: Cherry Hand Pies, dessert, baking